 SkyFi
SkyFi
How to Set Up the SkyFi MCP
Connect SkyFi's satellite imagery tools to Claude, ChatGPT, or any other MCP client in a couple of minutes. The SkyFi MCP server lives at:
https://mcp.skyfi.com/mcp
Once connected, Claude can search archive imagery, check tasking feasibility, estimate pricing, manage your saved AOIs, and place orders on your behalf — using your SkyFi account.
What you need
- A SkyFi account (sign up is free).
- A paid Claude plan (Pro, Max, Team, or Enterprise) for Claude Desktop custom connectors, or Claude Code installed for the CLI route.
Jump to: Claude Desktop · Claude Code · Claude organization (Team & Enterprise) · ChatGPT · Other MCP clients · Smoke test · Troubleshooting · Video walkthroughs
Set Up in Claude Desktop
-
Open Connector settings. In Claude Desktop, go to Settings → Connectors (on macOS:
Claudemenu →Settings…, or press⌘ ,).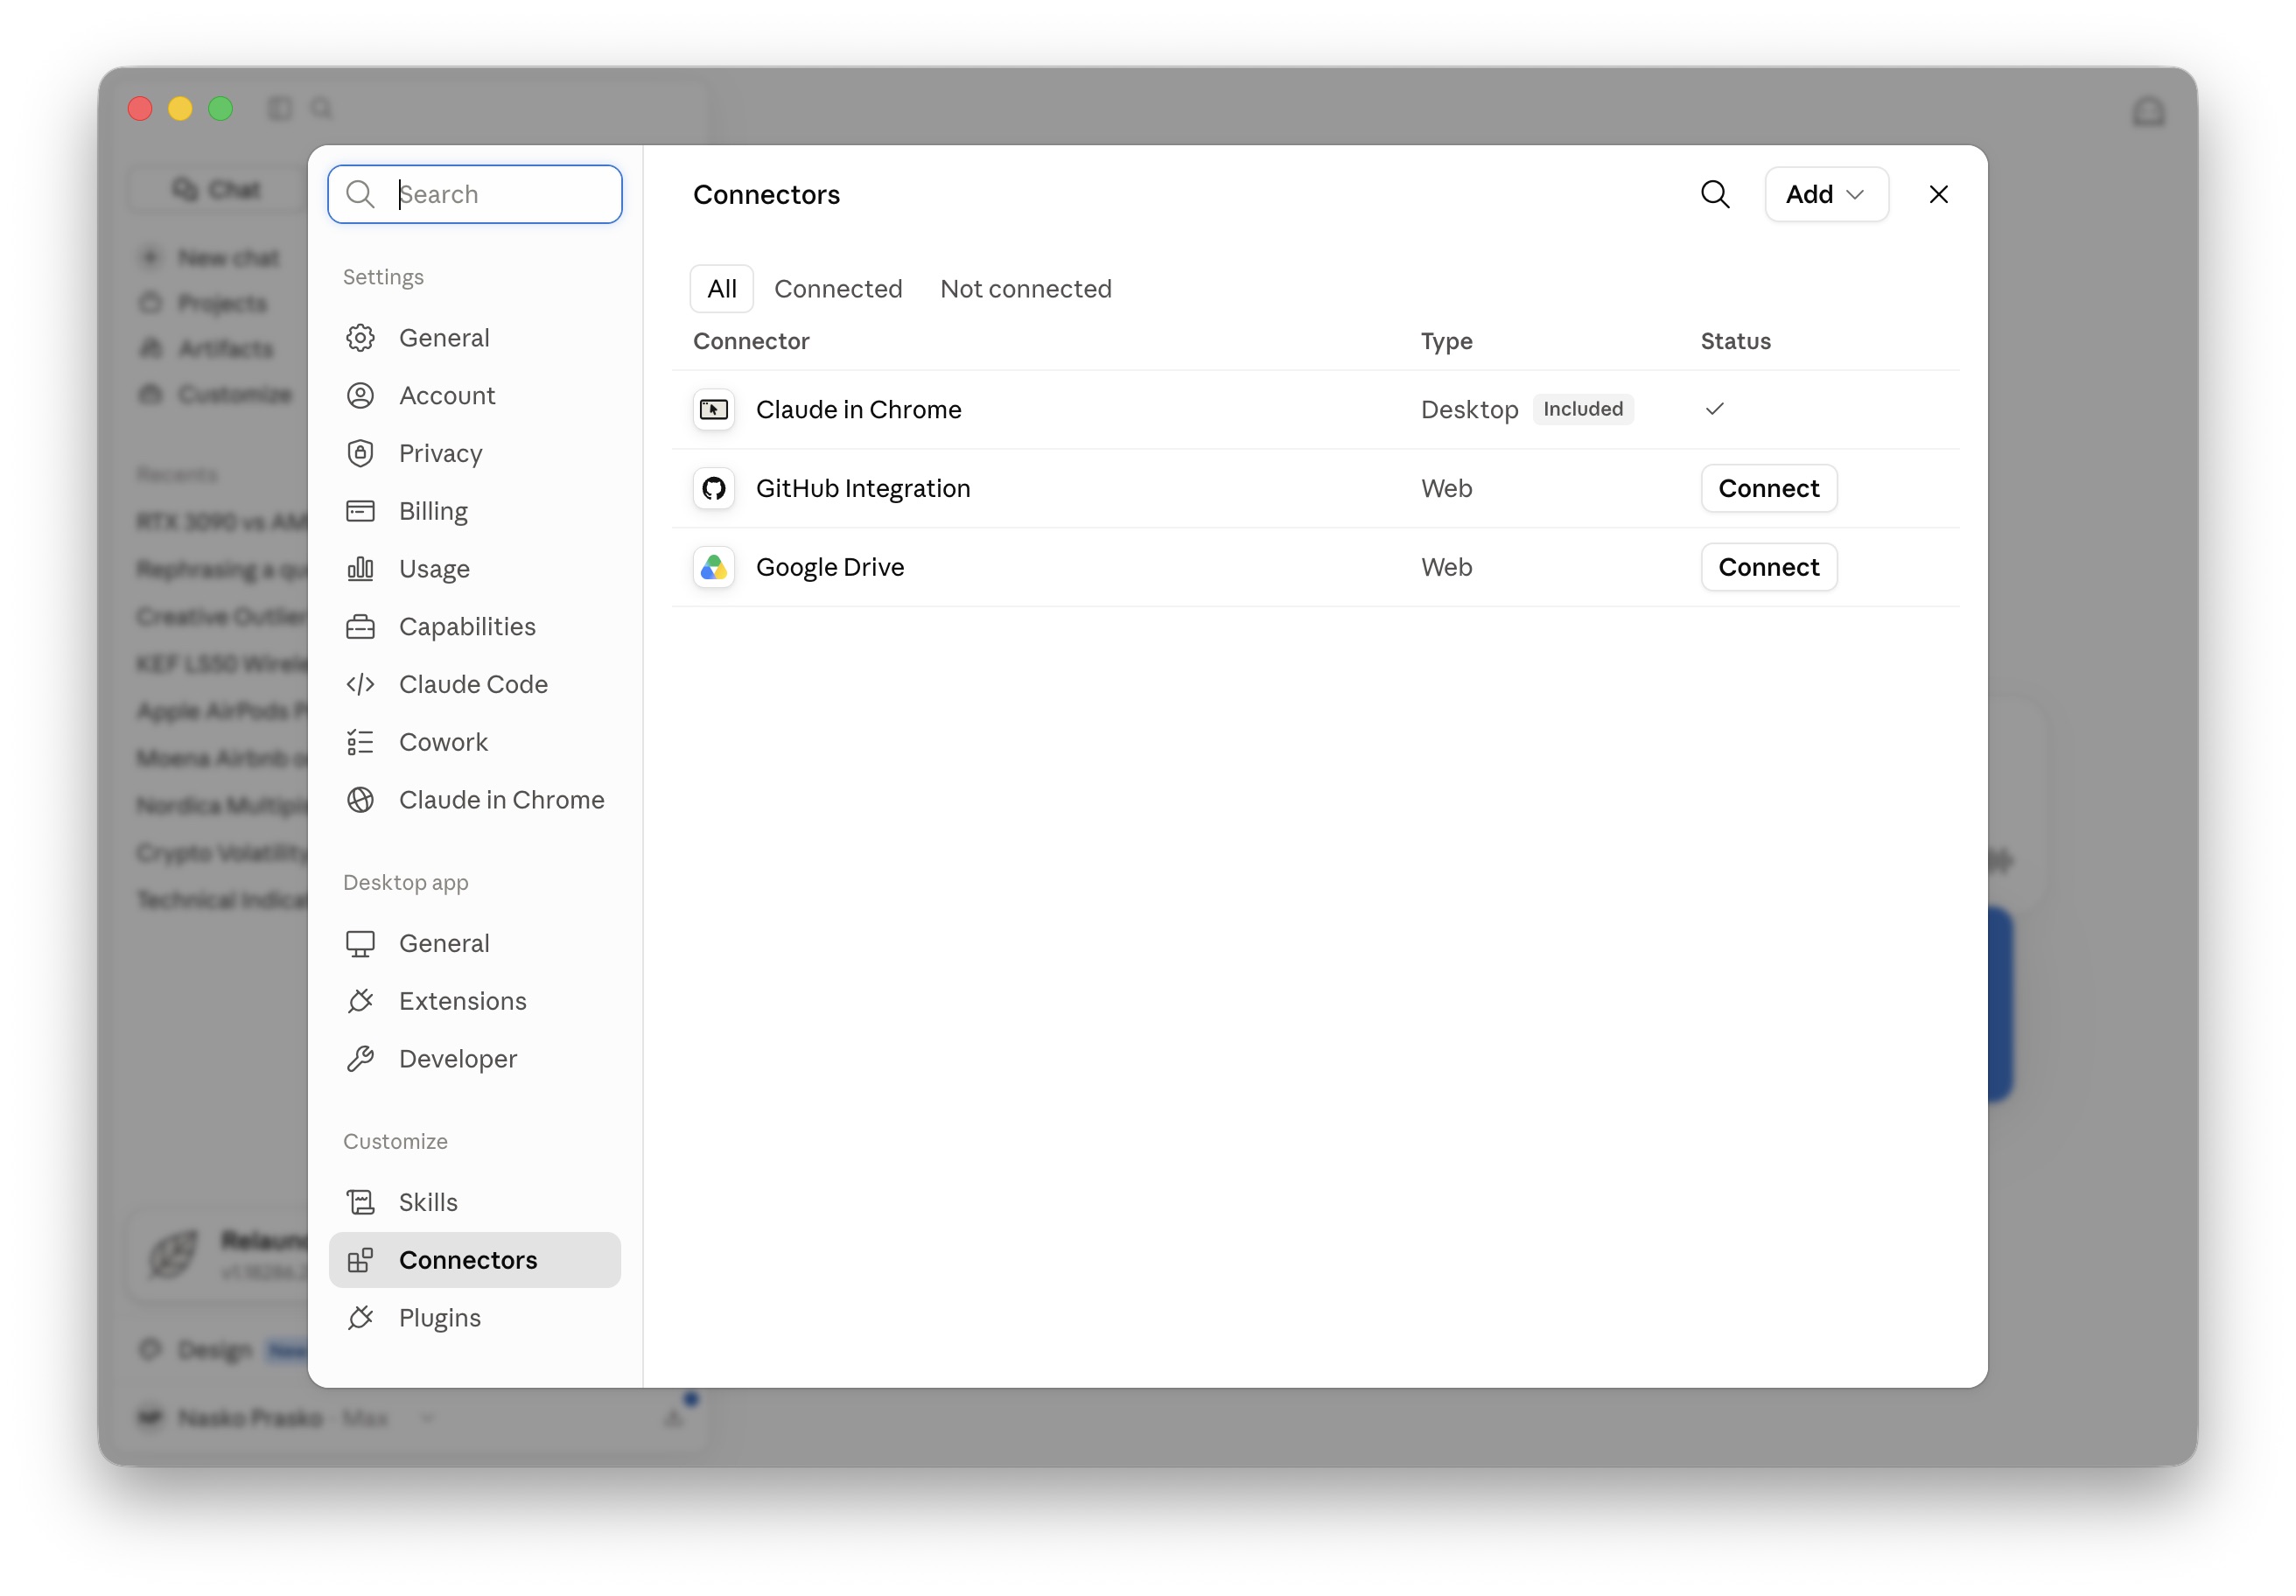
-
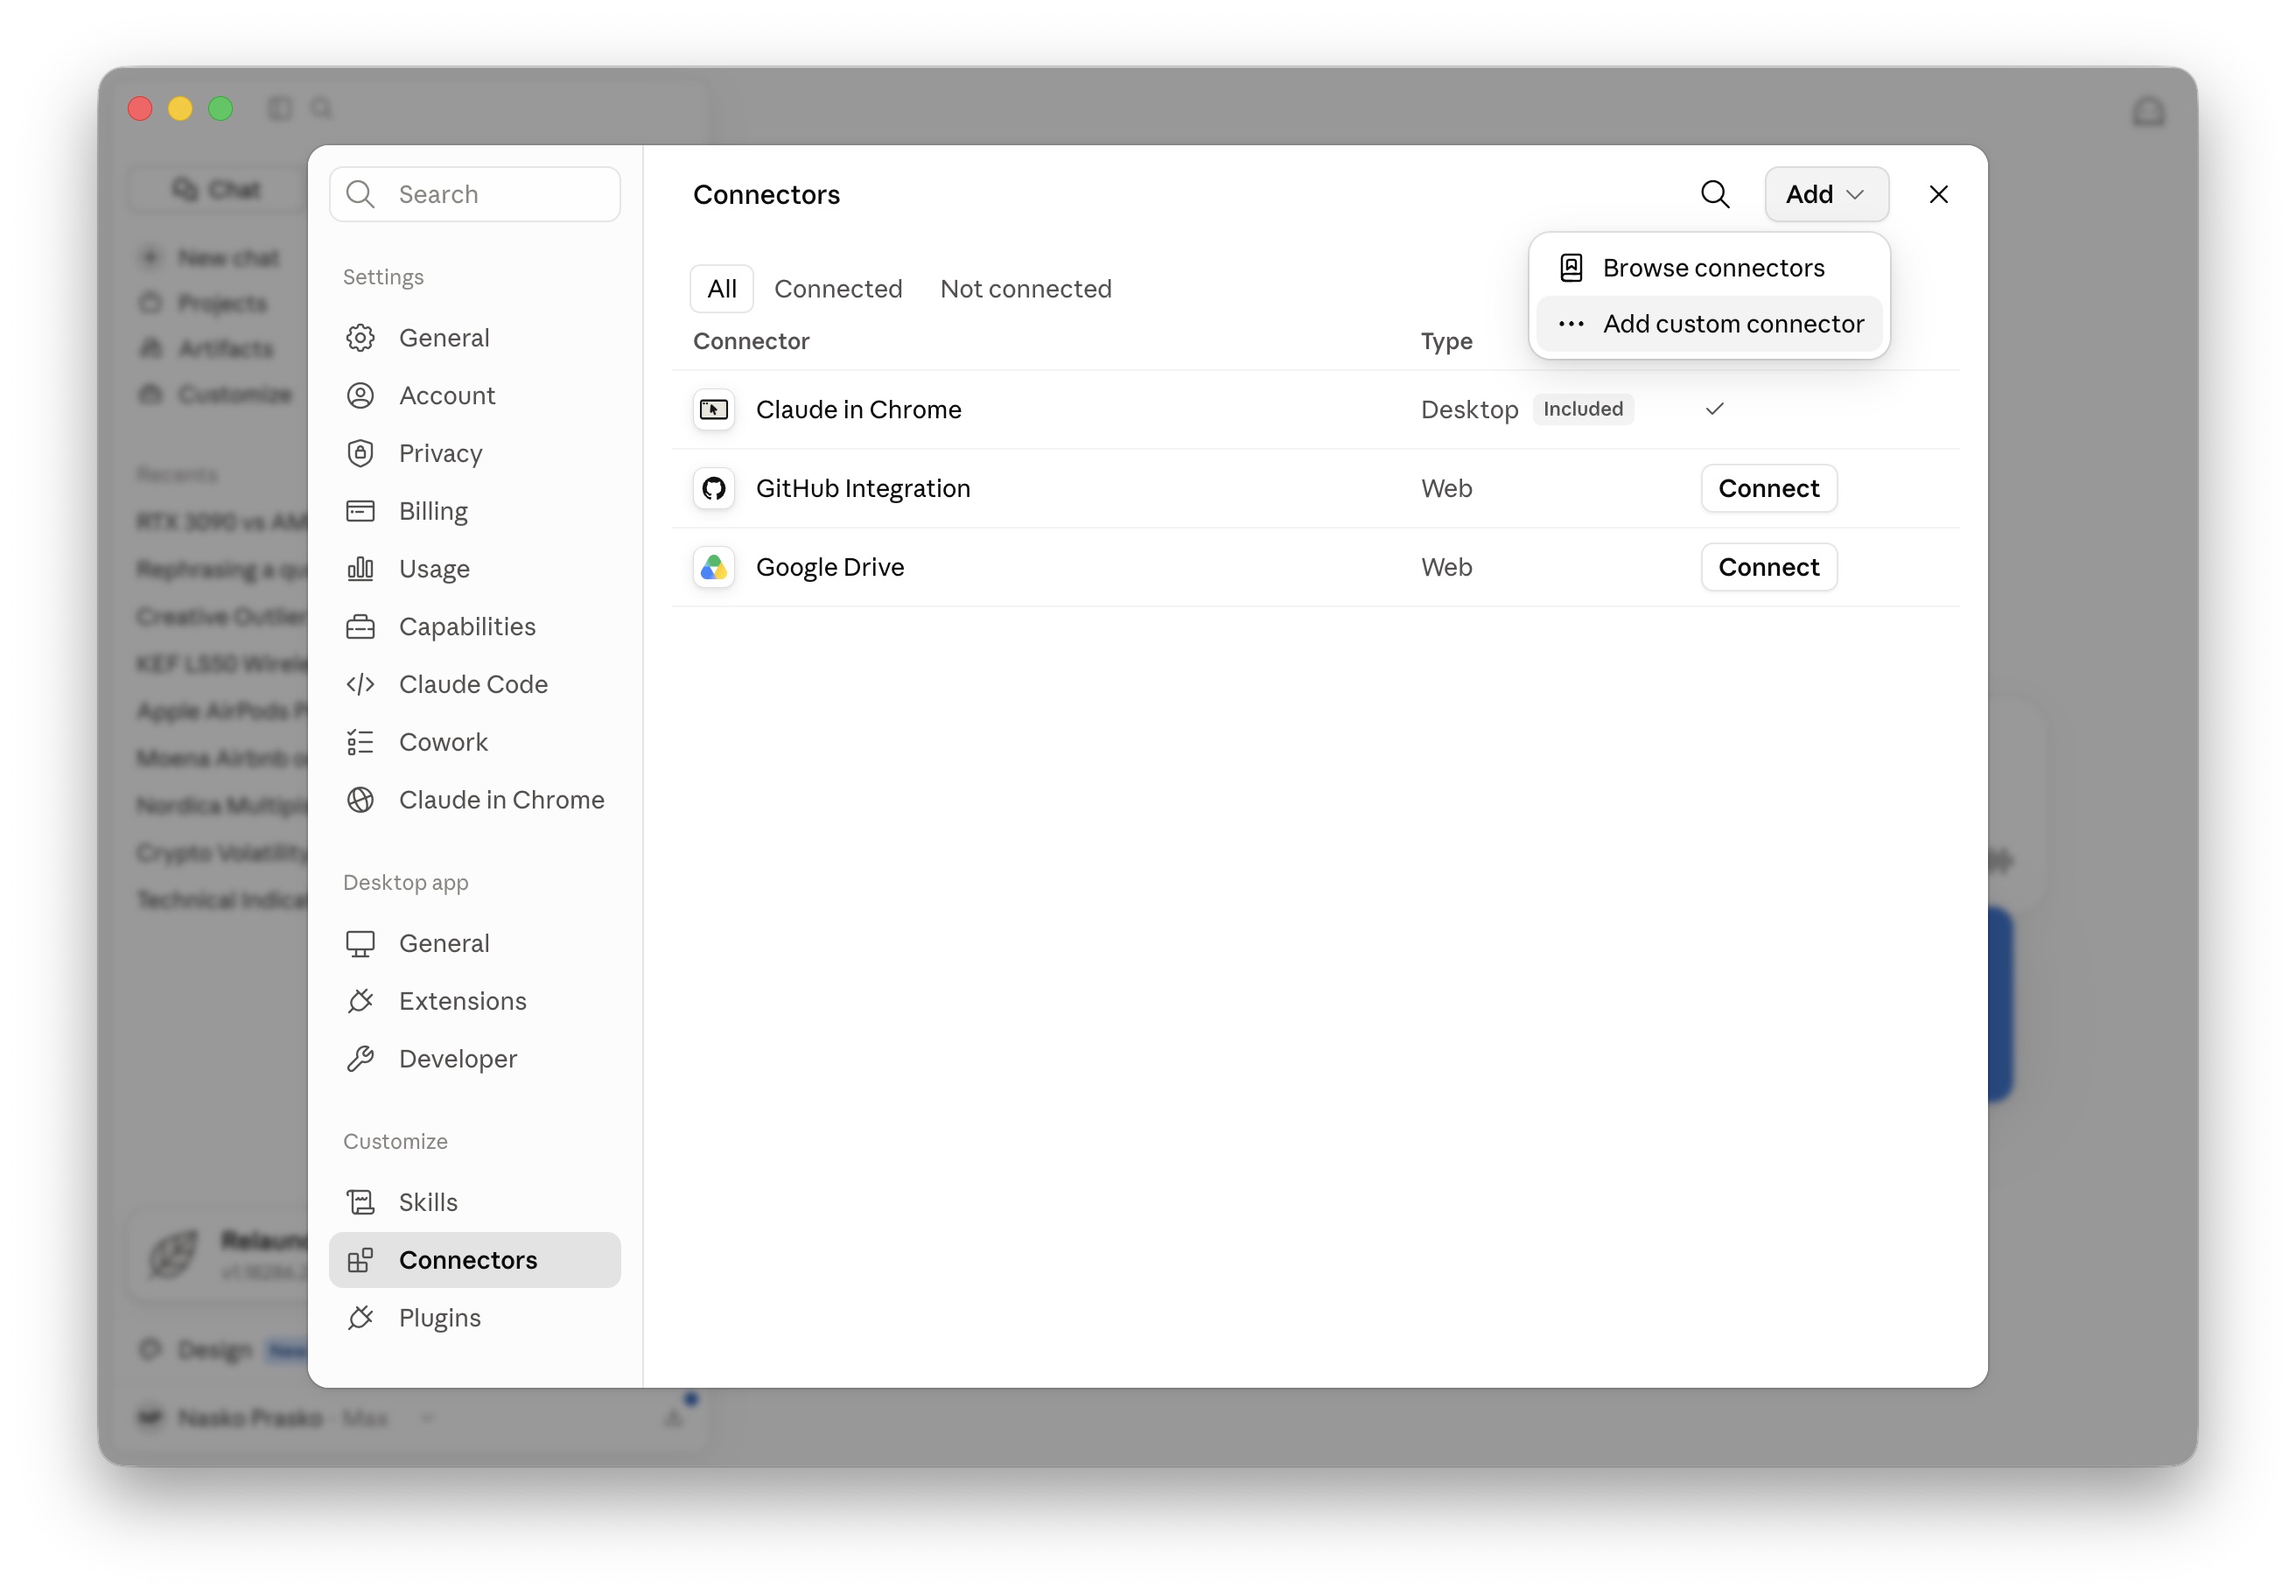
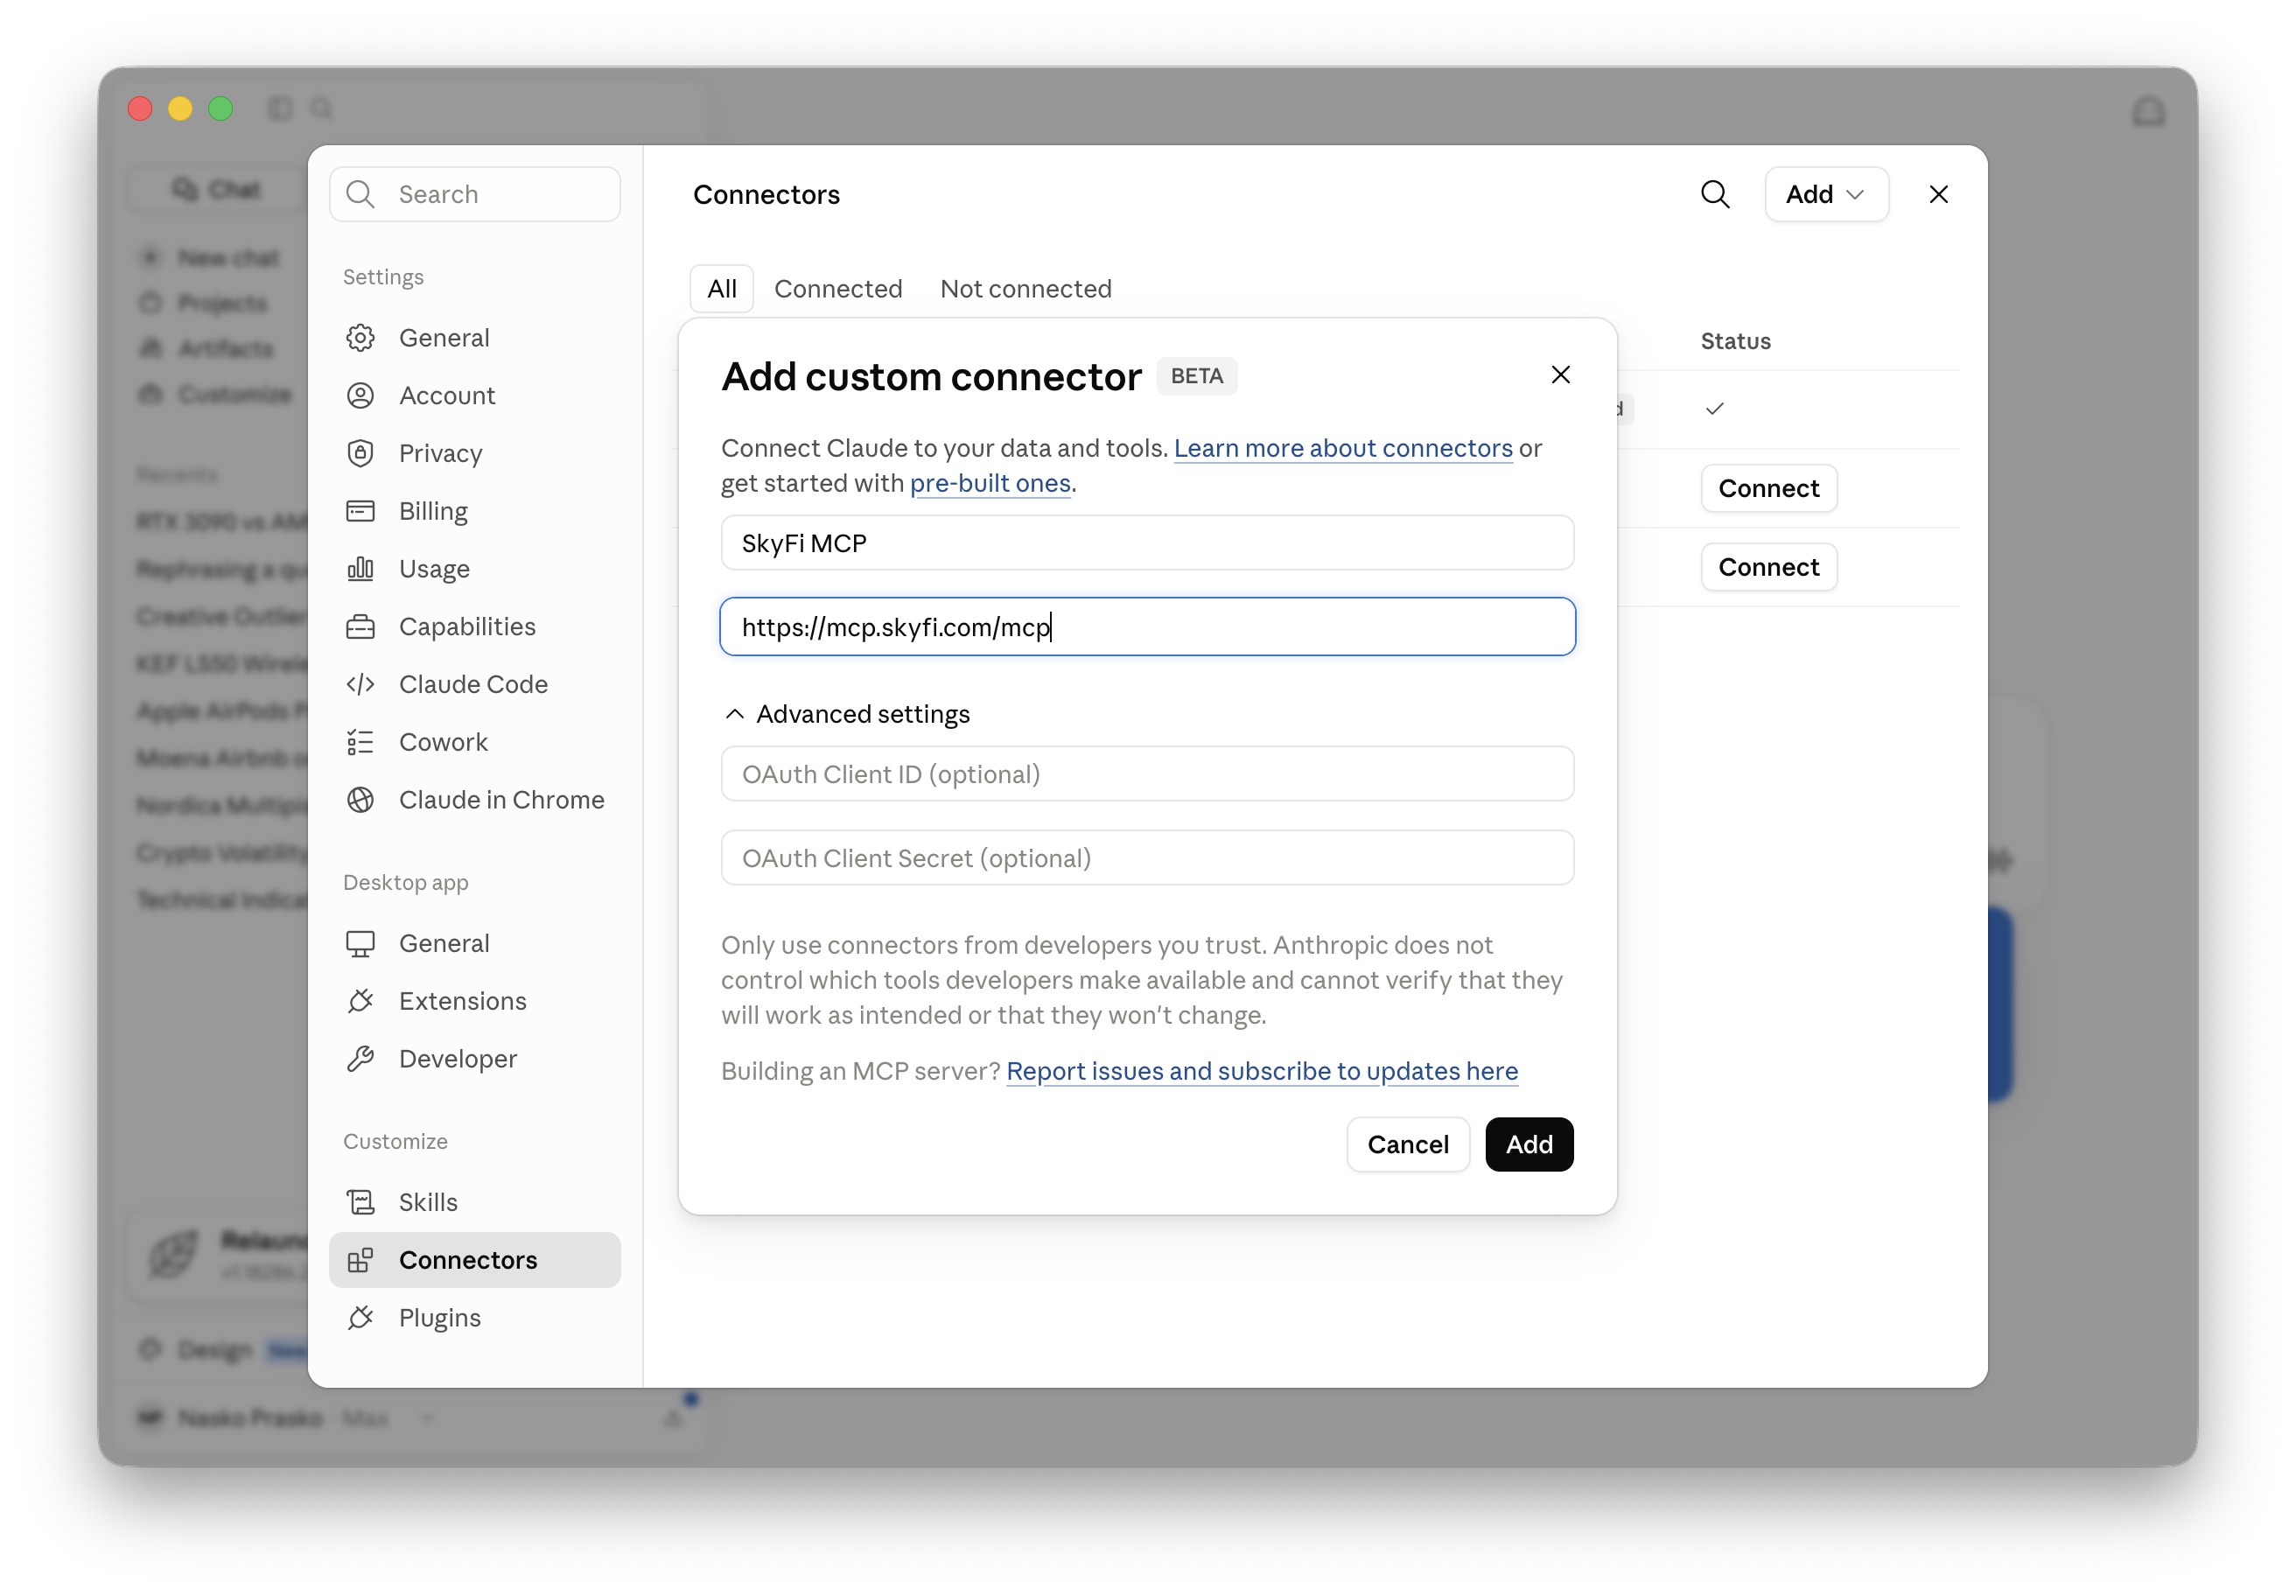
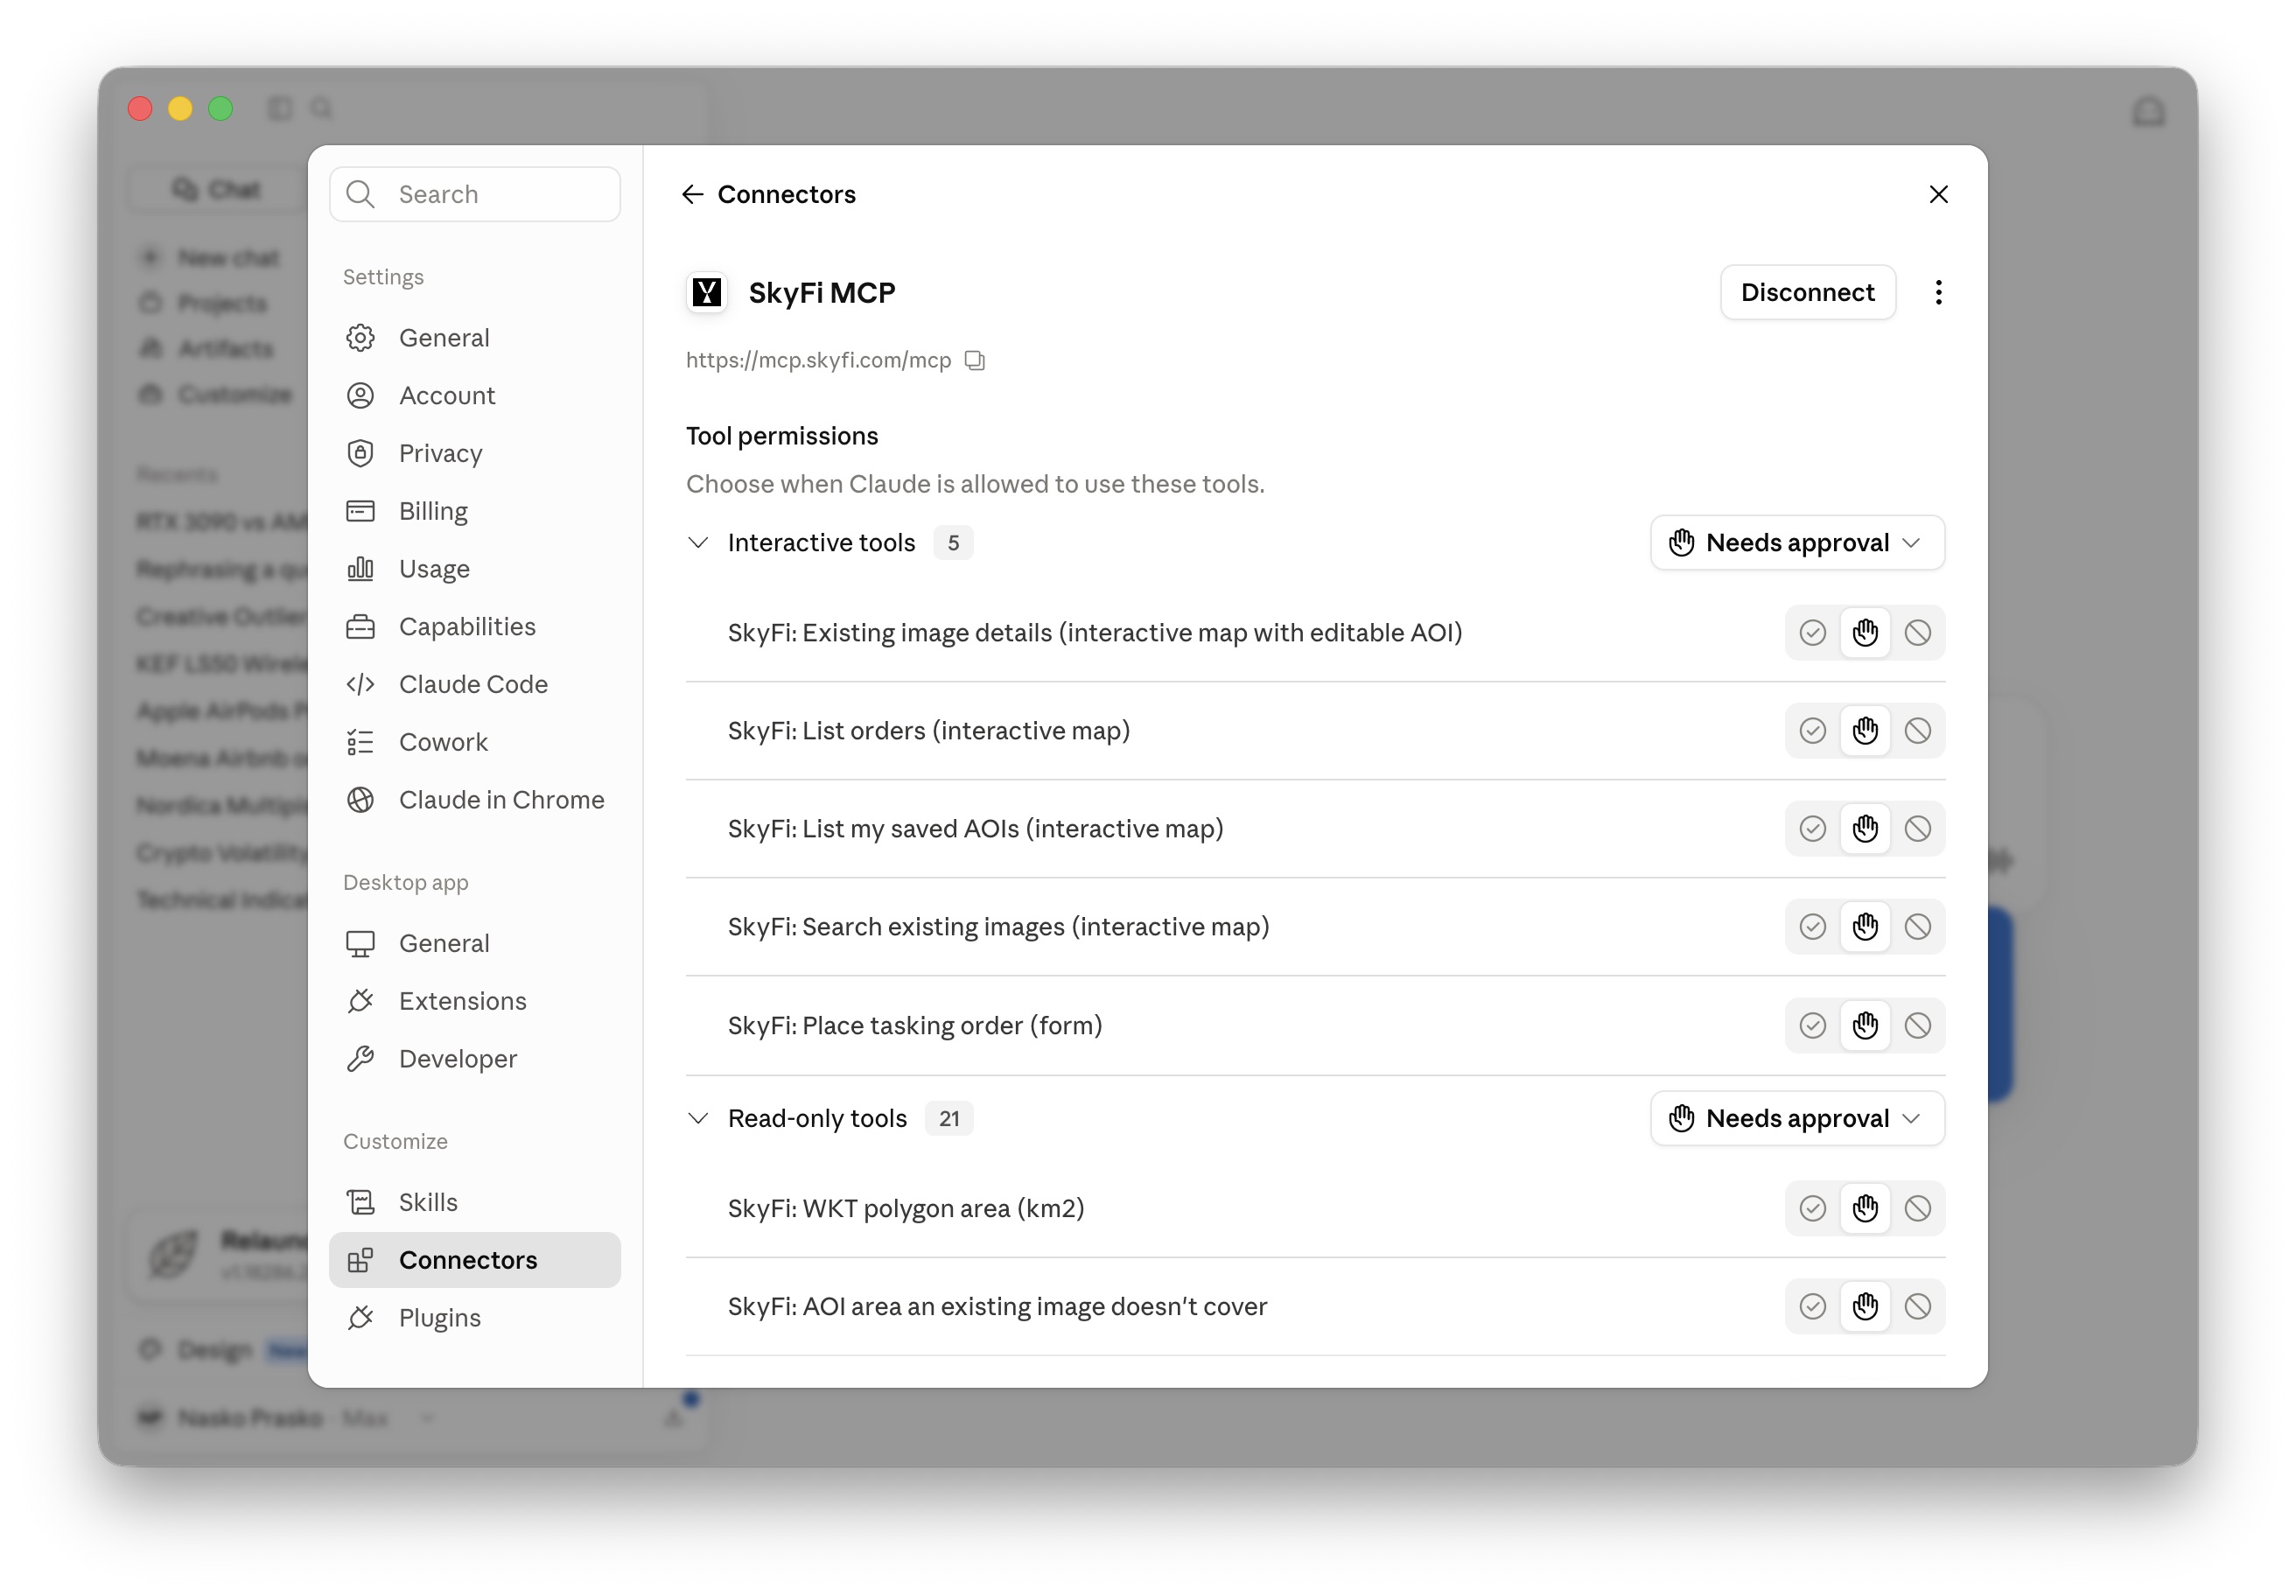
Add a custom connector. Scroll to the bottom of the connectors list and click Add custom connector. Fill in:
- Name:
SkyFi MCP - URL:
https://mcp.skyfi.com/mcp
Then click Add.
- Name:
-
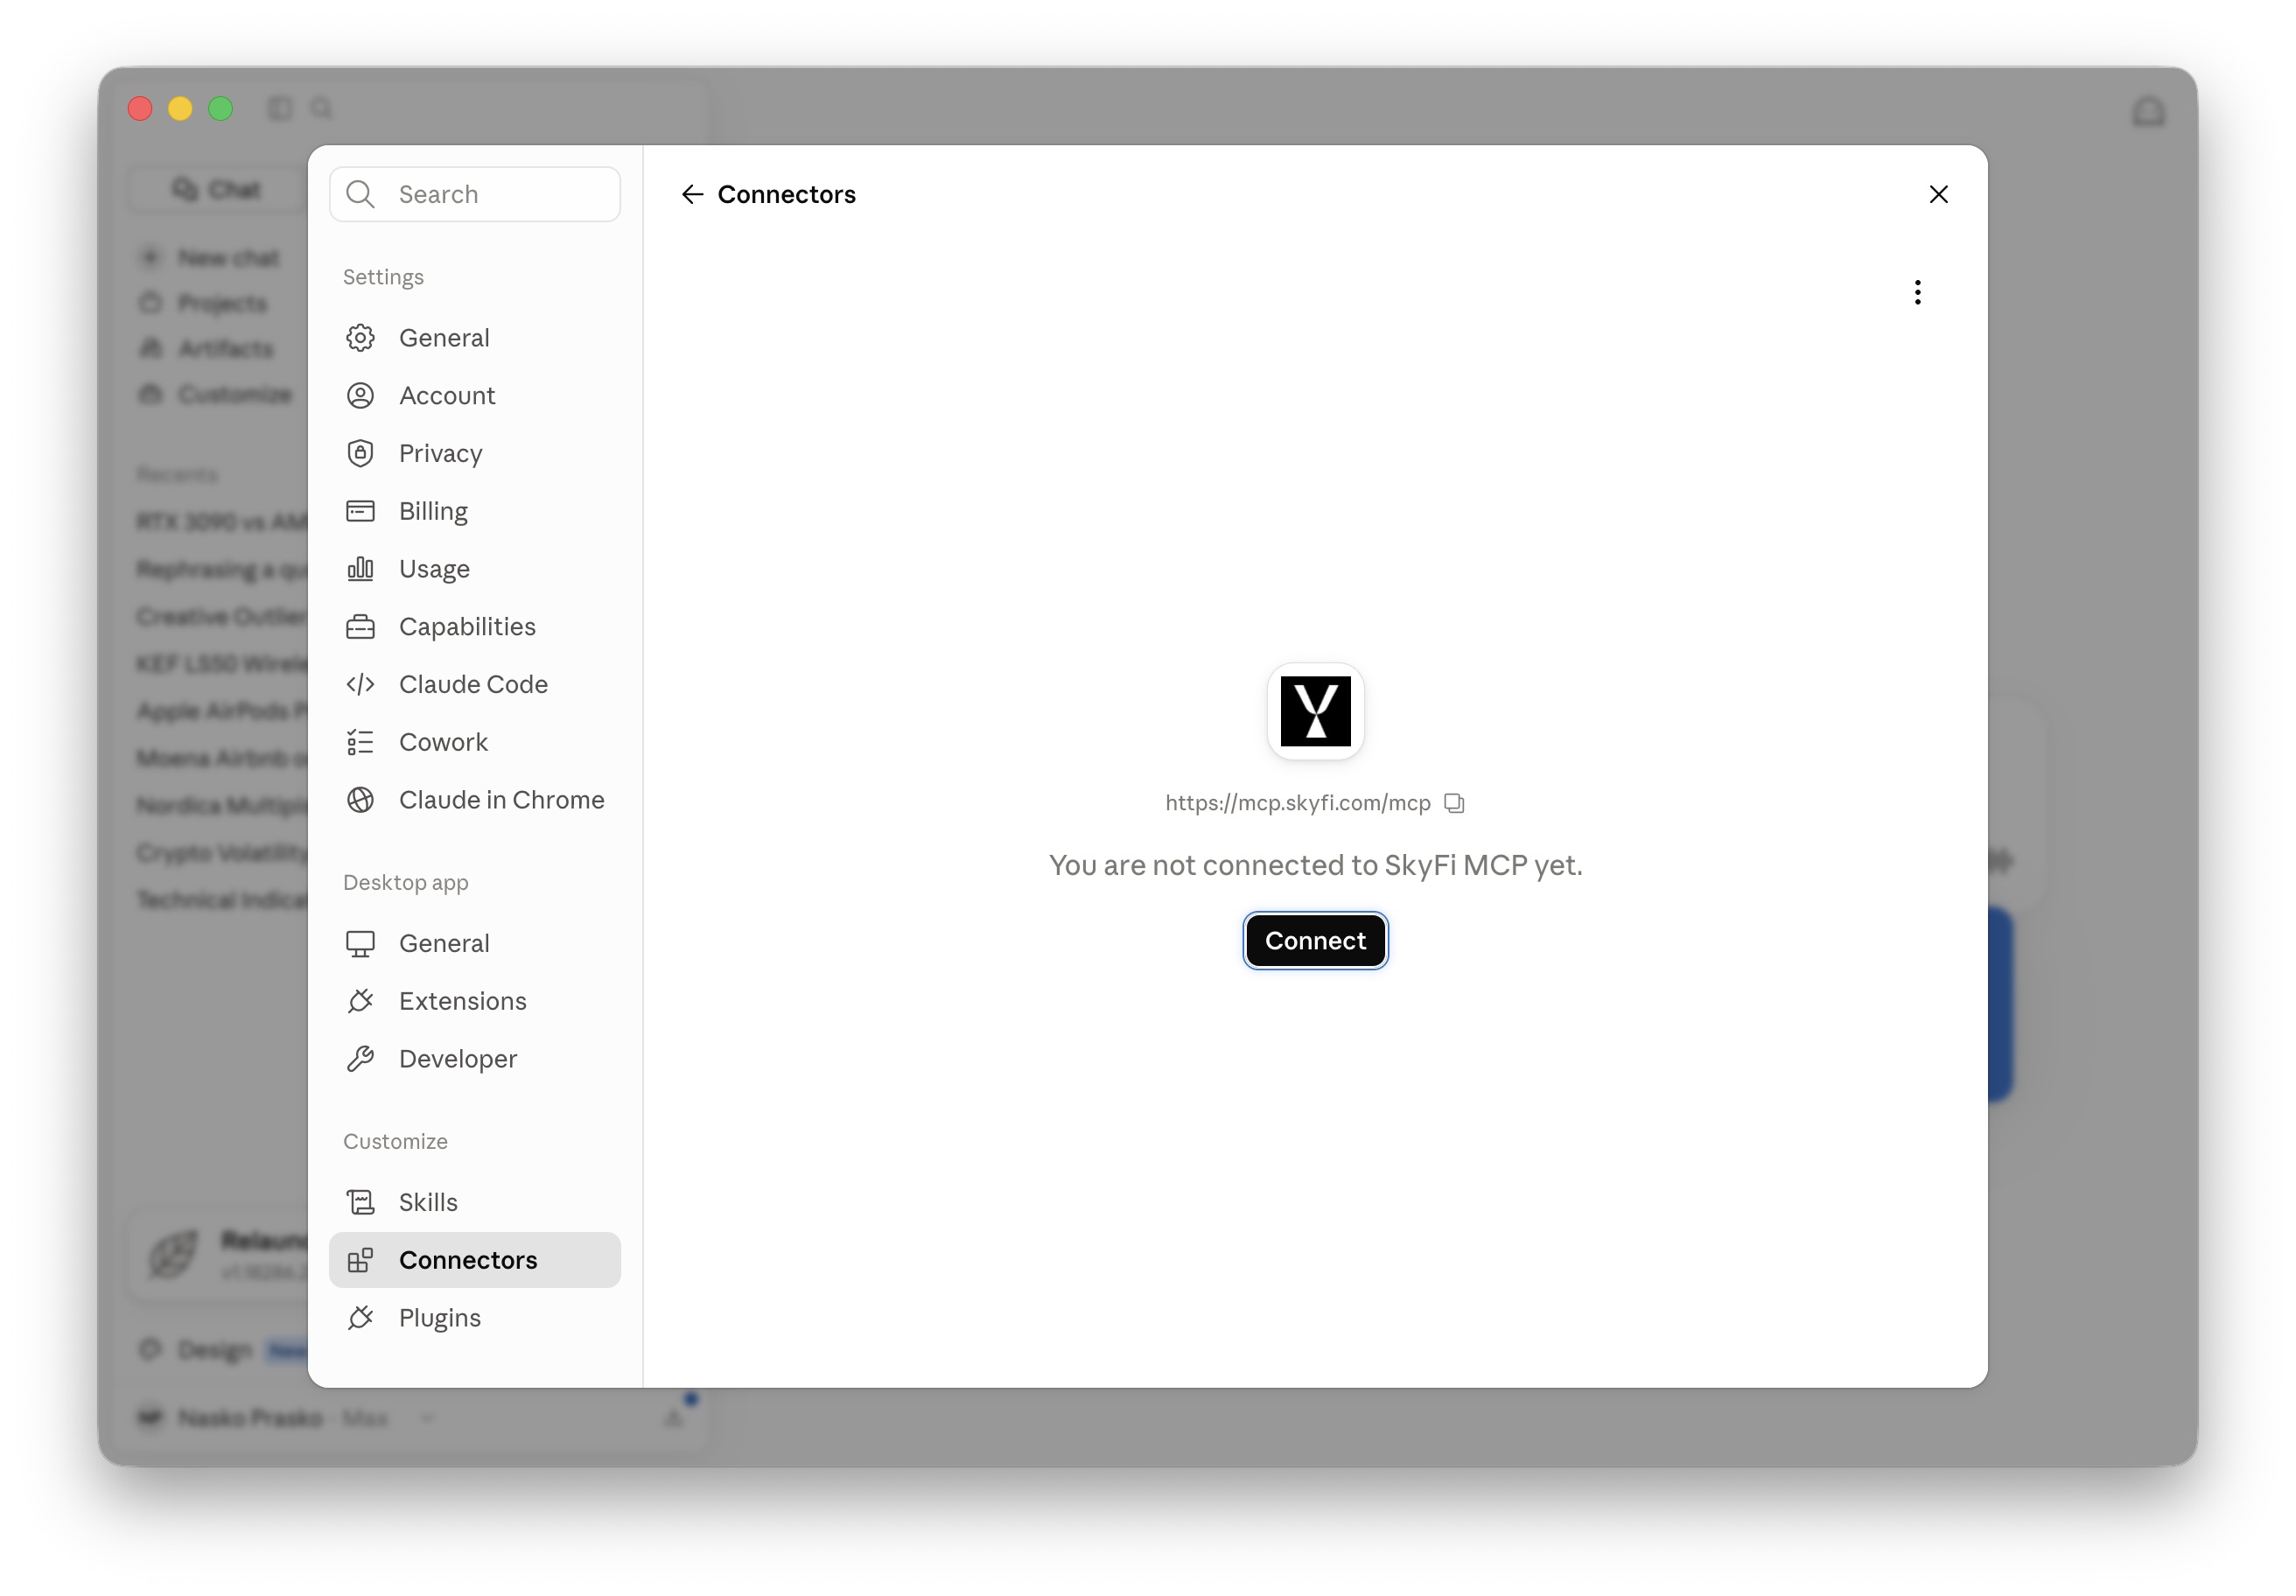
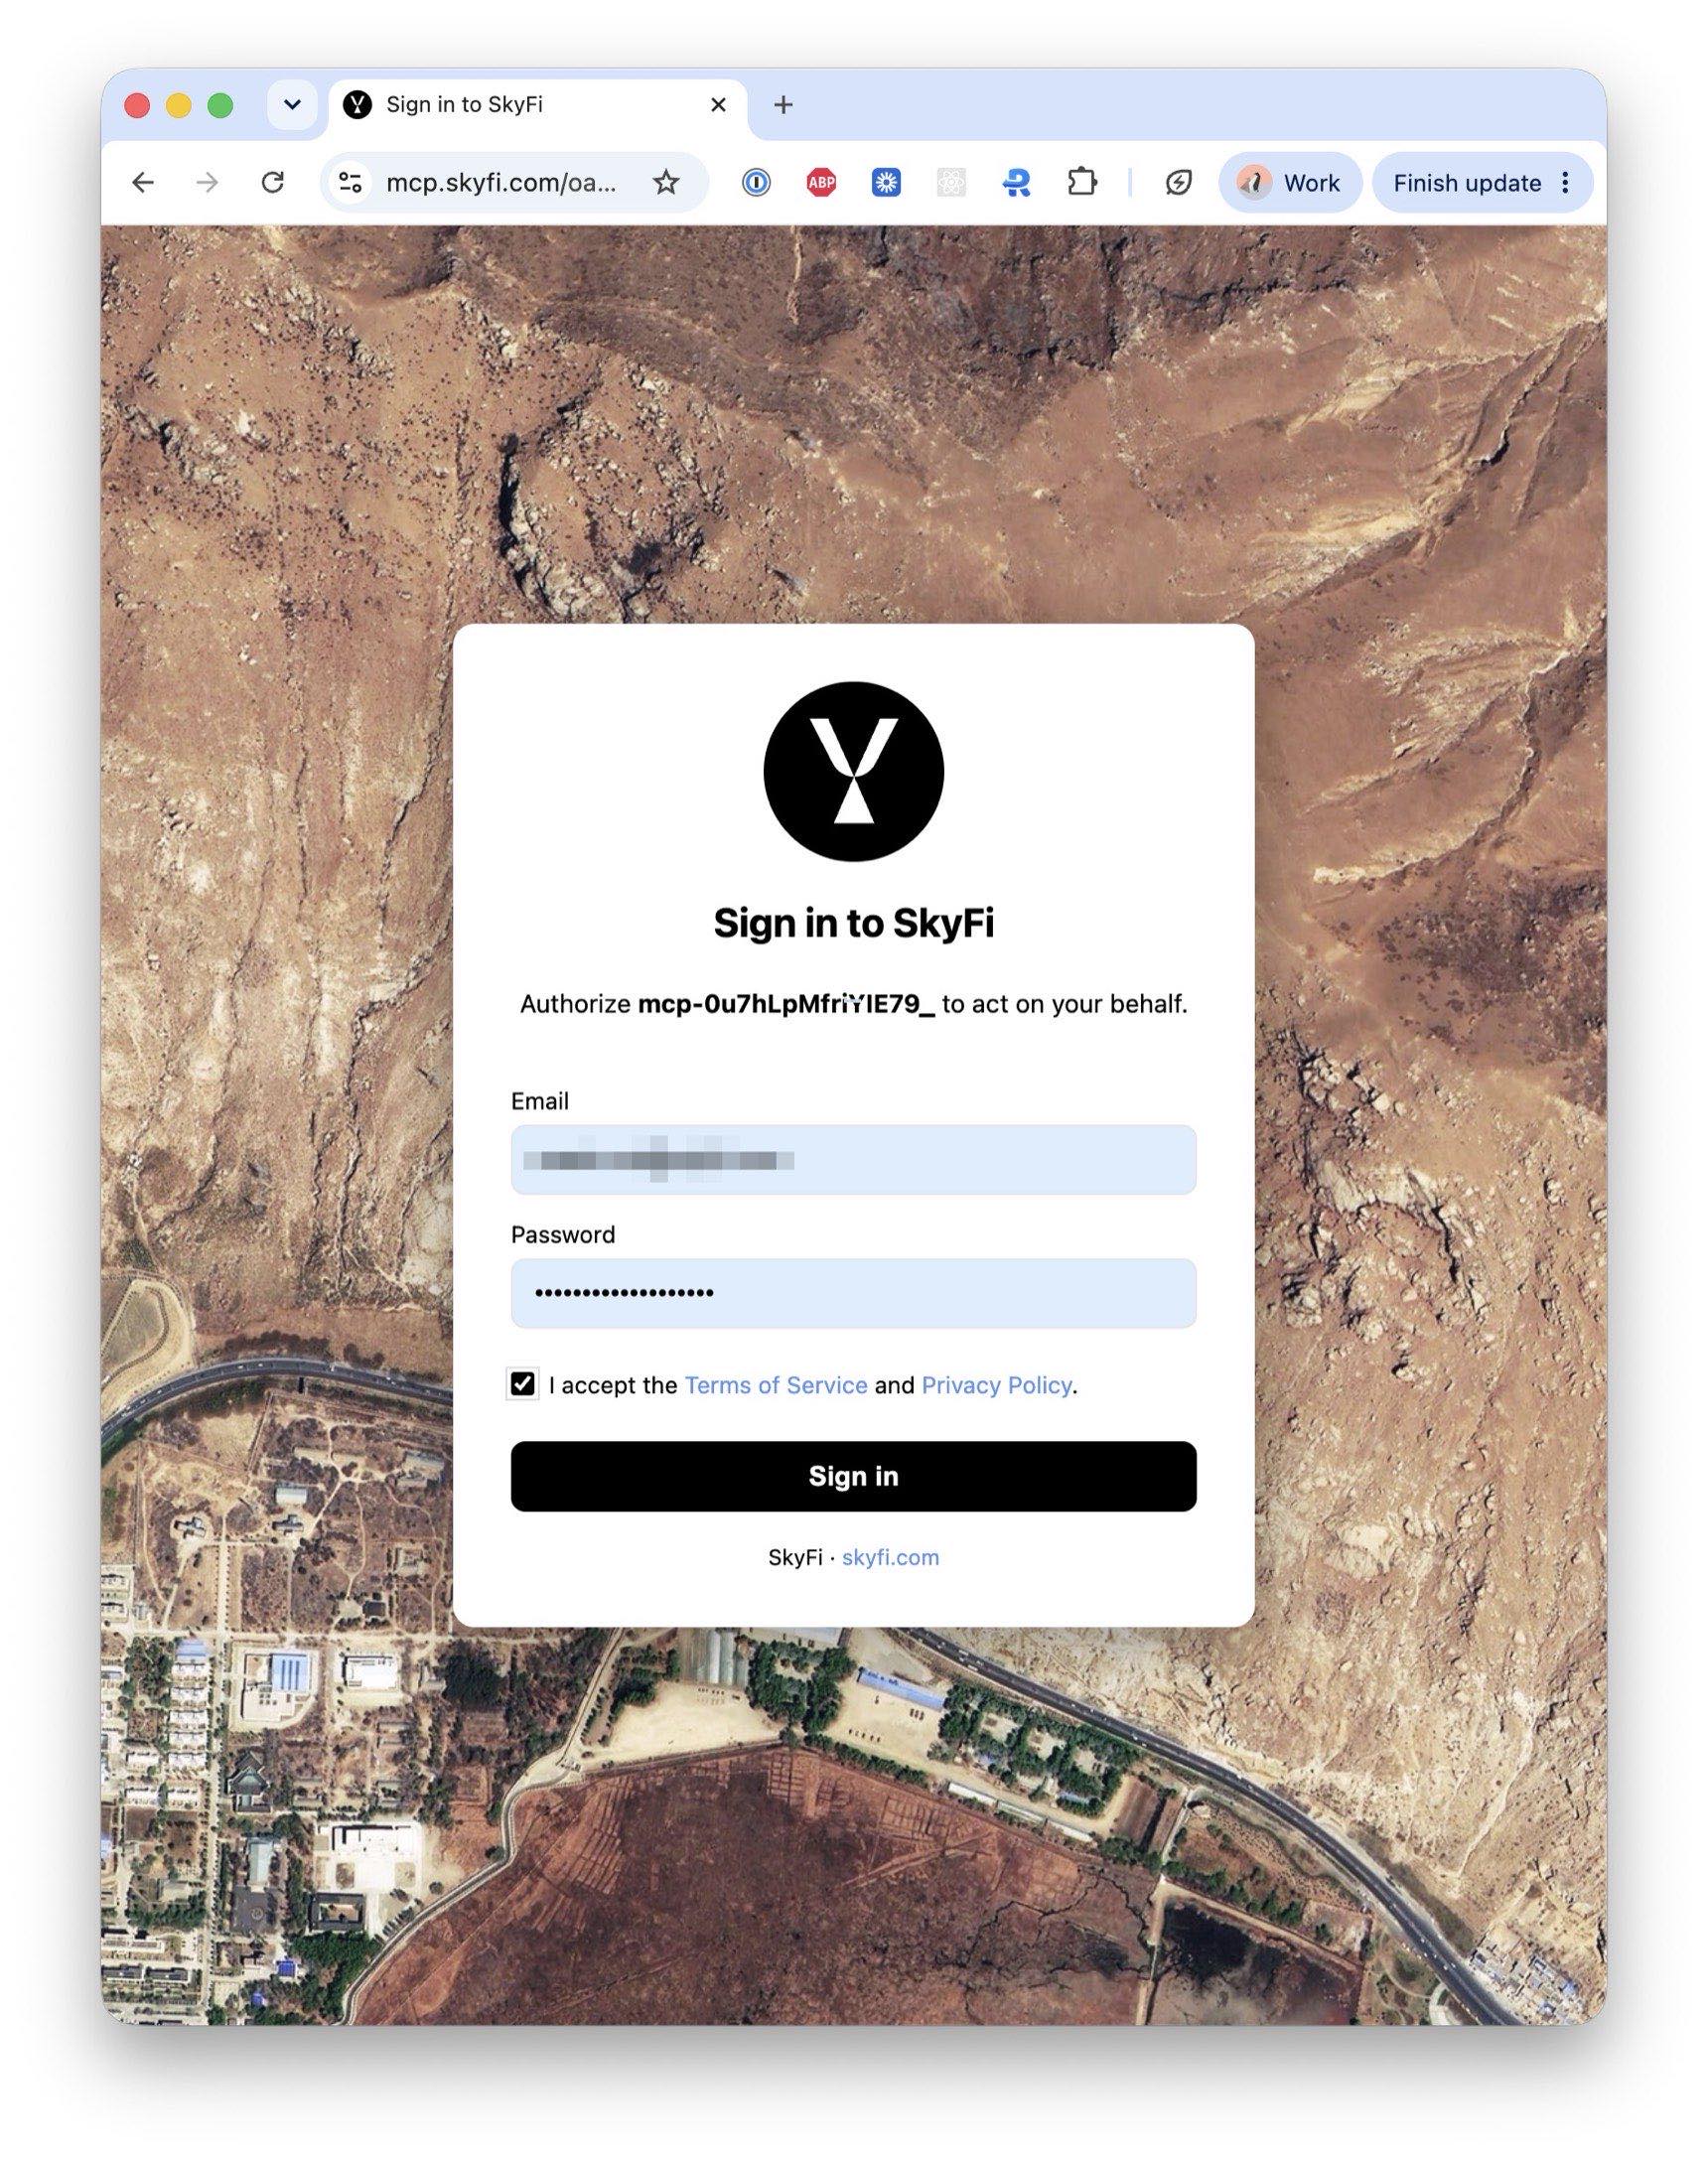
Connect and sign in. Click Connect next to the new SkyFi connector. Your browser opens SkyFi's sign-in page — log in with your SkyFi credentials, accept the Terms of Service, and approve the requested access. You'll be redirected back and the connector will show as connected.
-
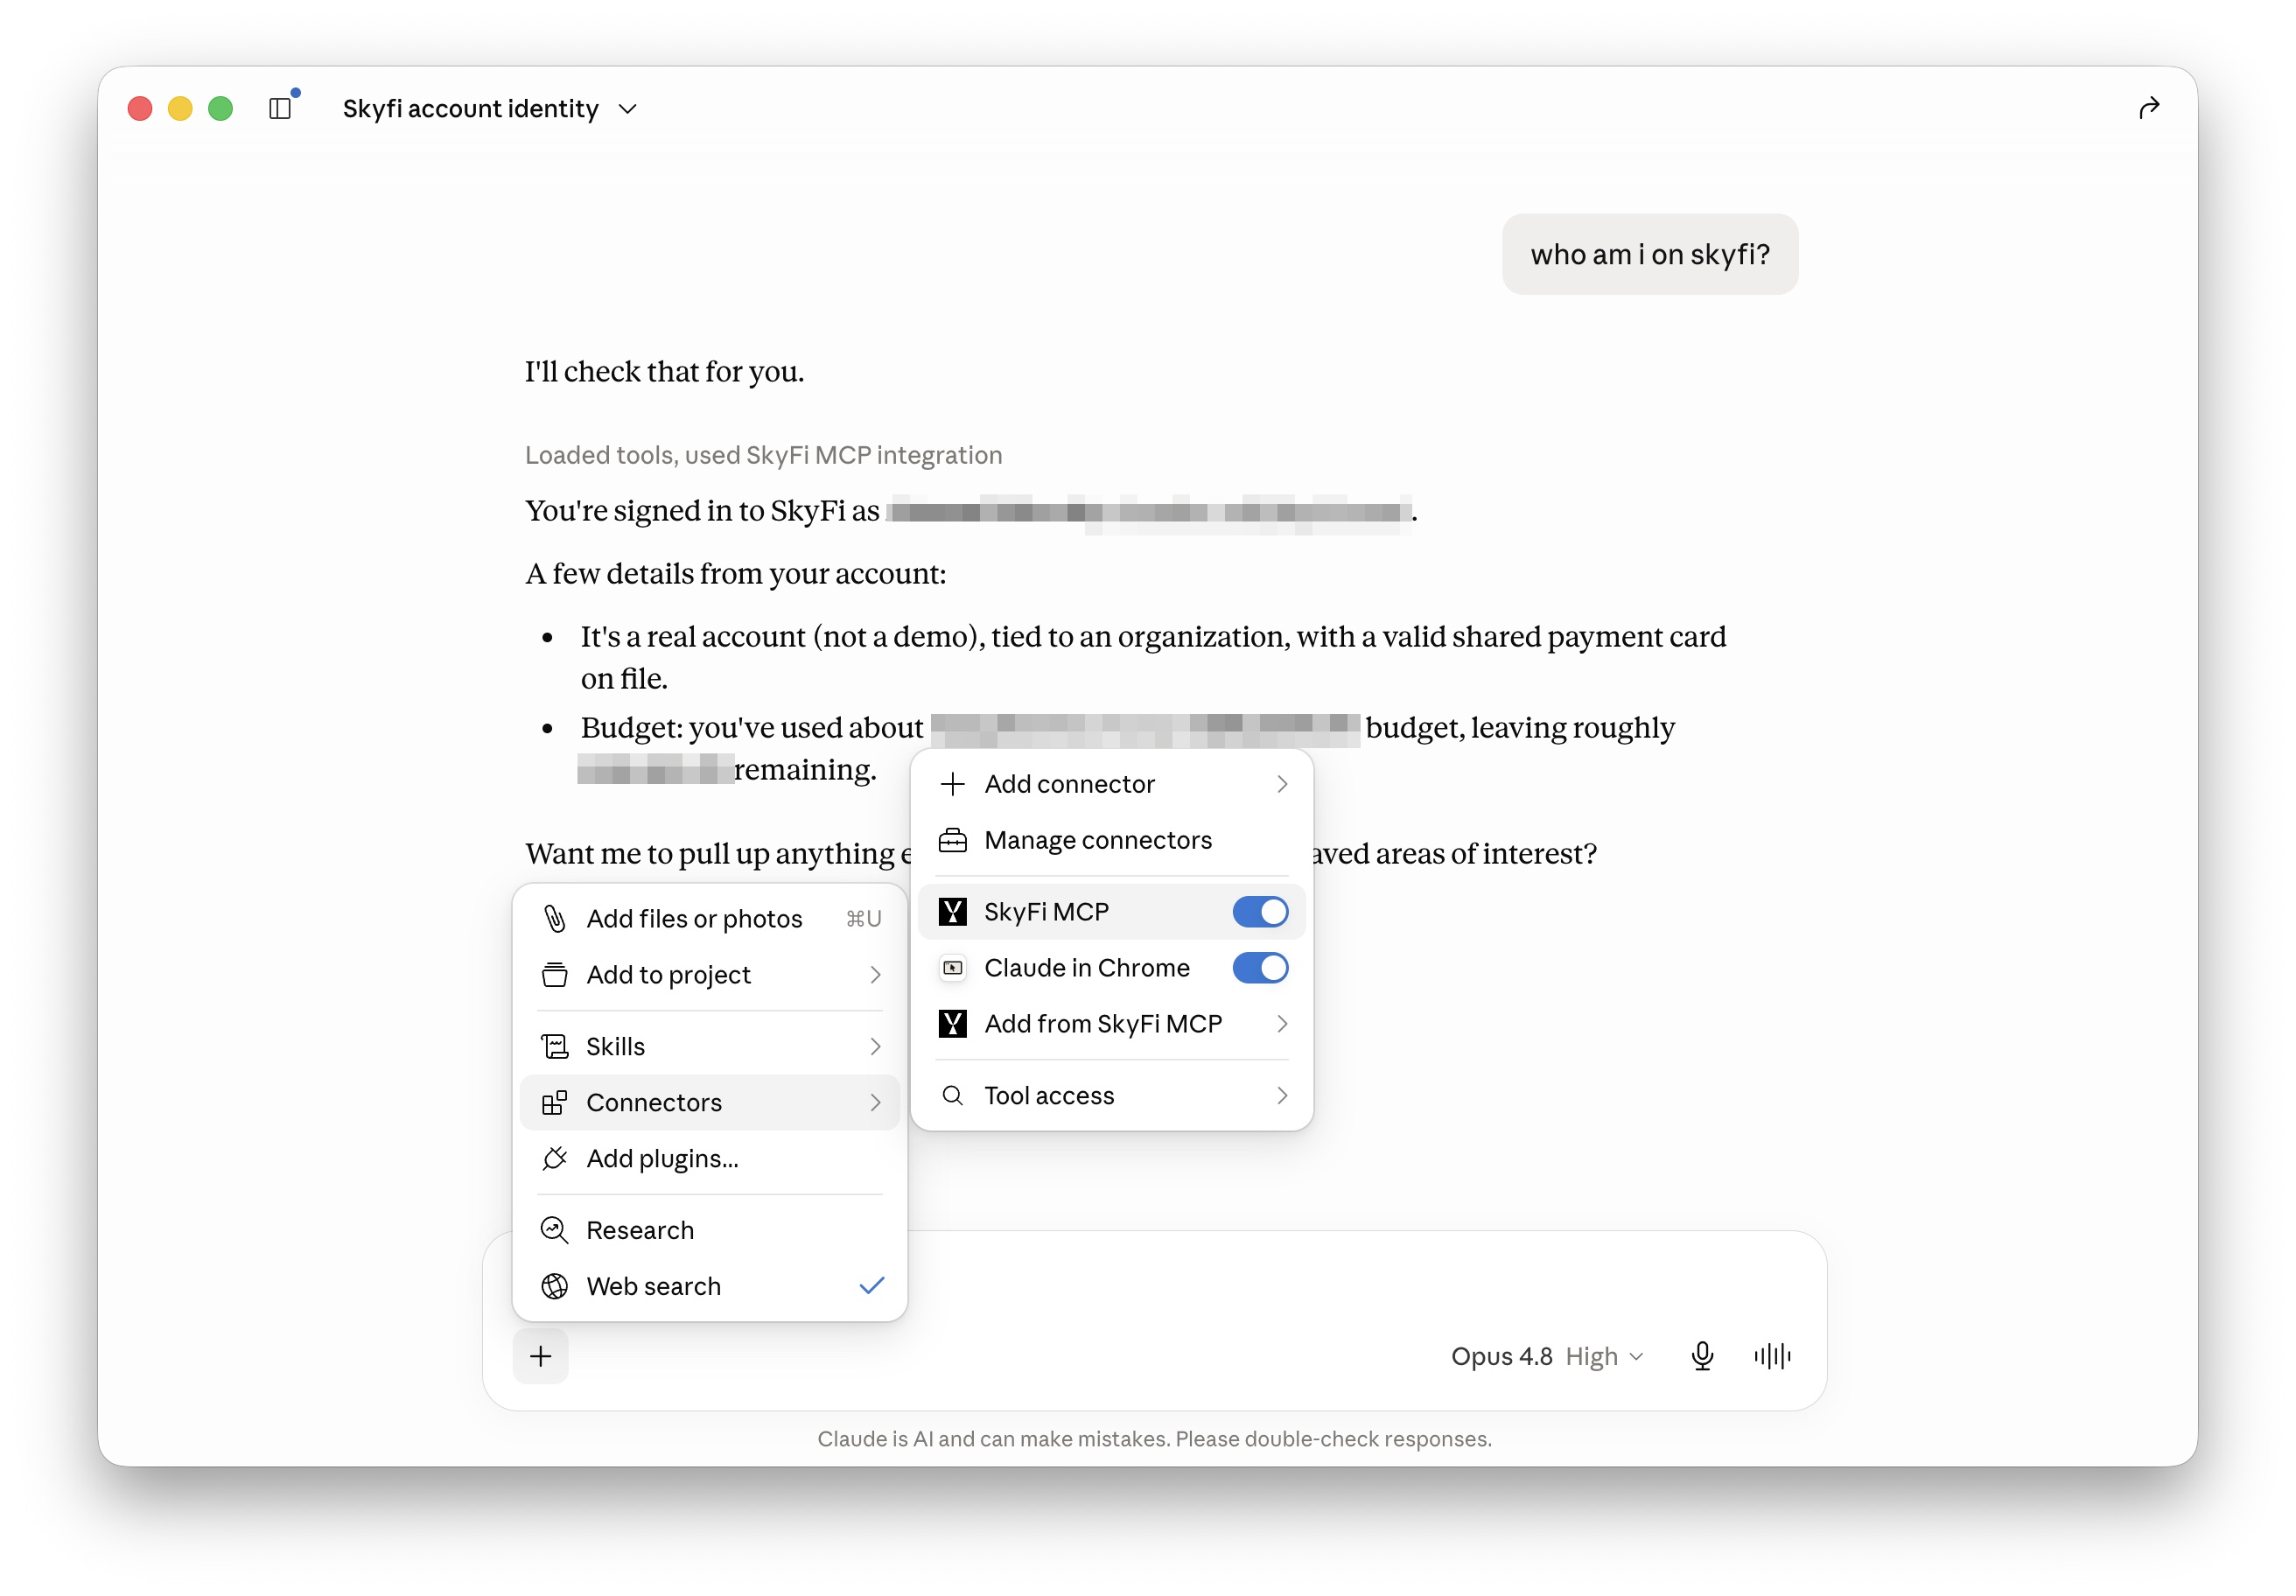
Enable it in a chat. In a new conversation, open the search and tools menu (the sliders icon under the message box) and make sure SkyFi MCP is toggled on. Then try:
Who am I on SkyFi.
The same steps work on claude.ai in the browser — the Connectors settings are shared between the web app and the desktop app.
Set Up in Claude Code
-
Add the server. In your terminal, run:
claude mcp add --transport http skyfi-mcp https://mcp.skyfi.com/mcpBy default this registers SkyFi for the current project. Add
--scope userto make it available in every project:claude mcp add --transport http --scope user skyfi-mcp https://mcp.skyfi.com/mcp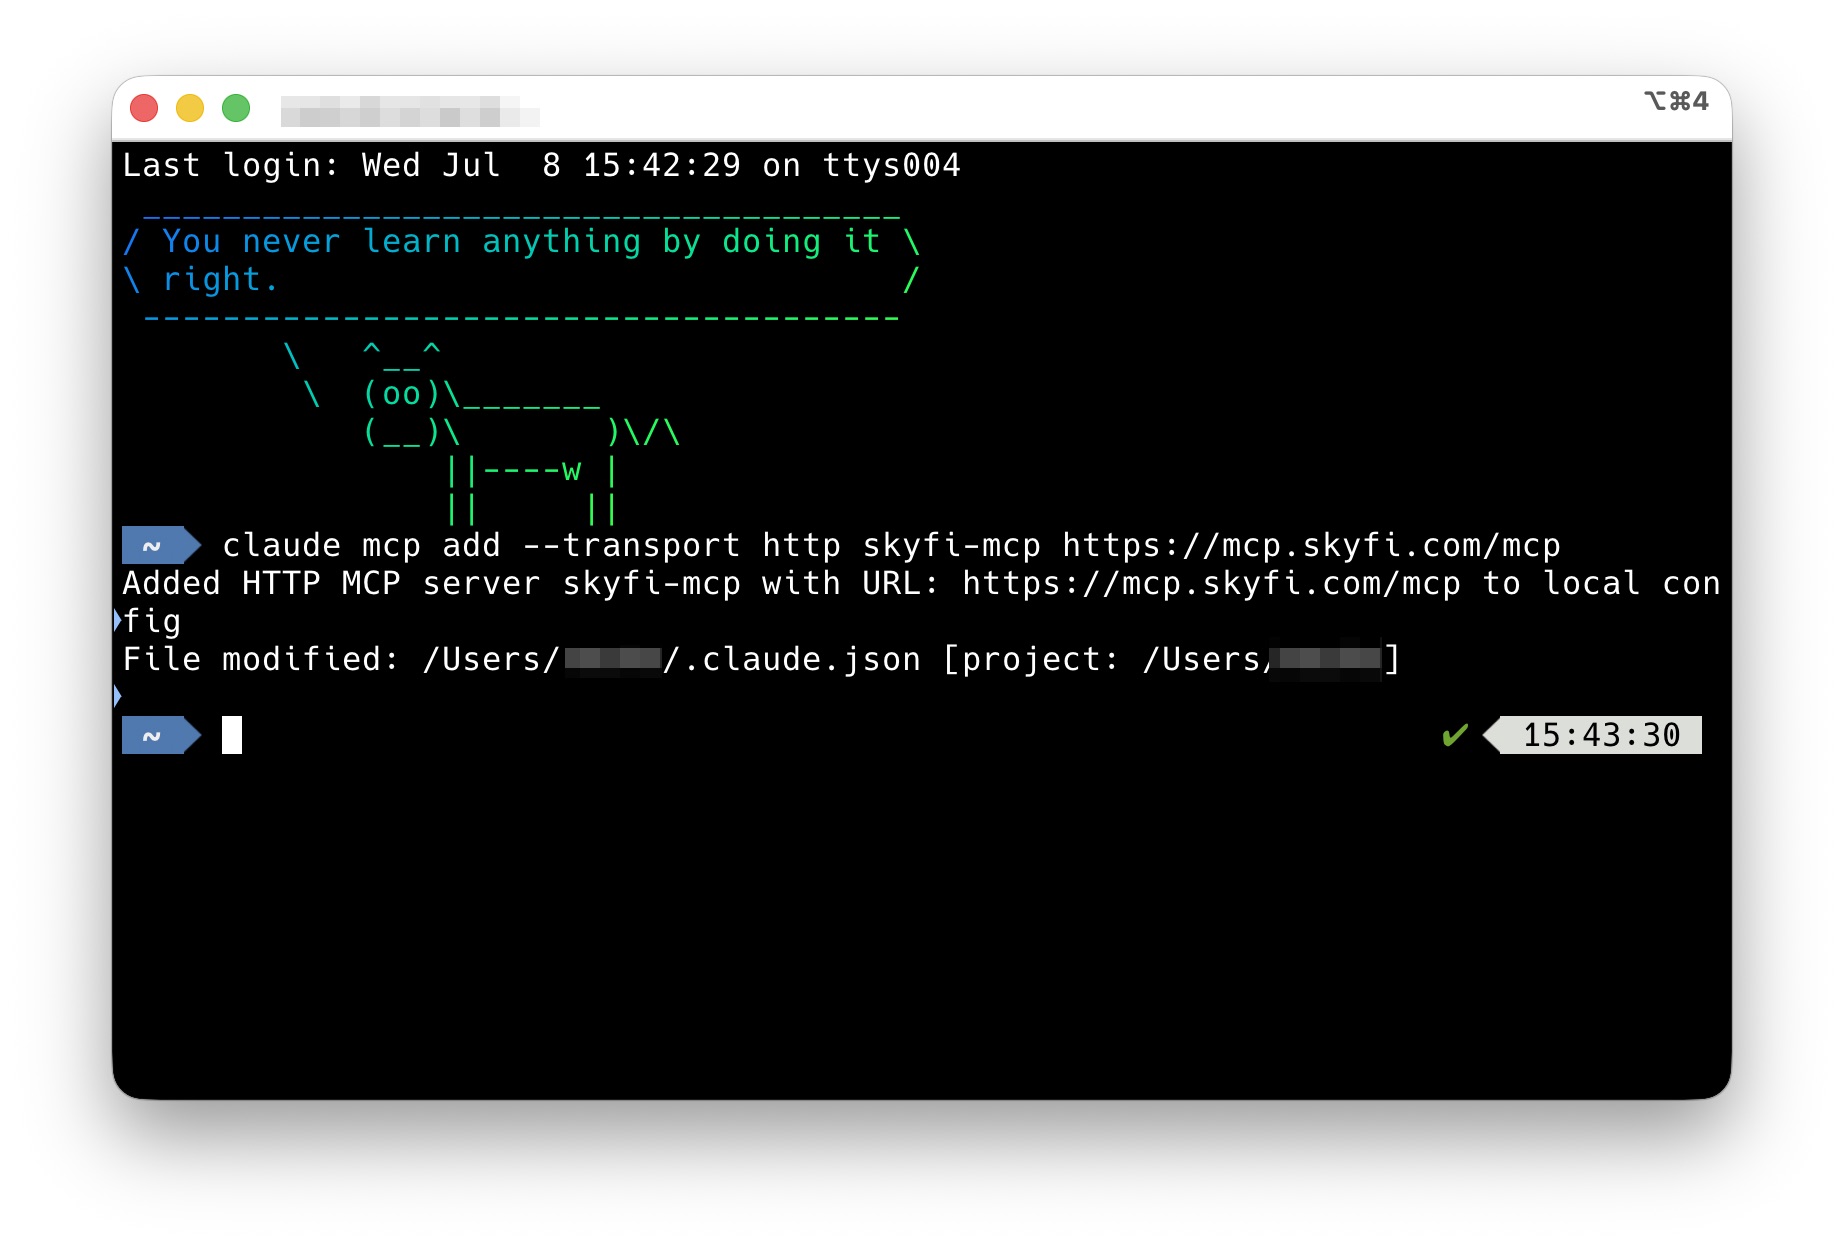
-
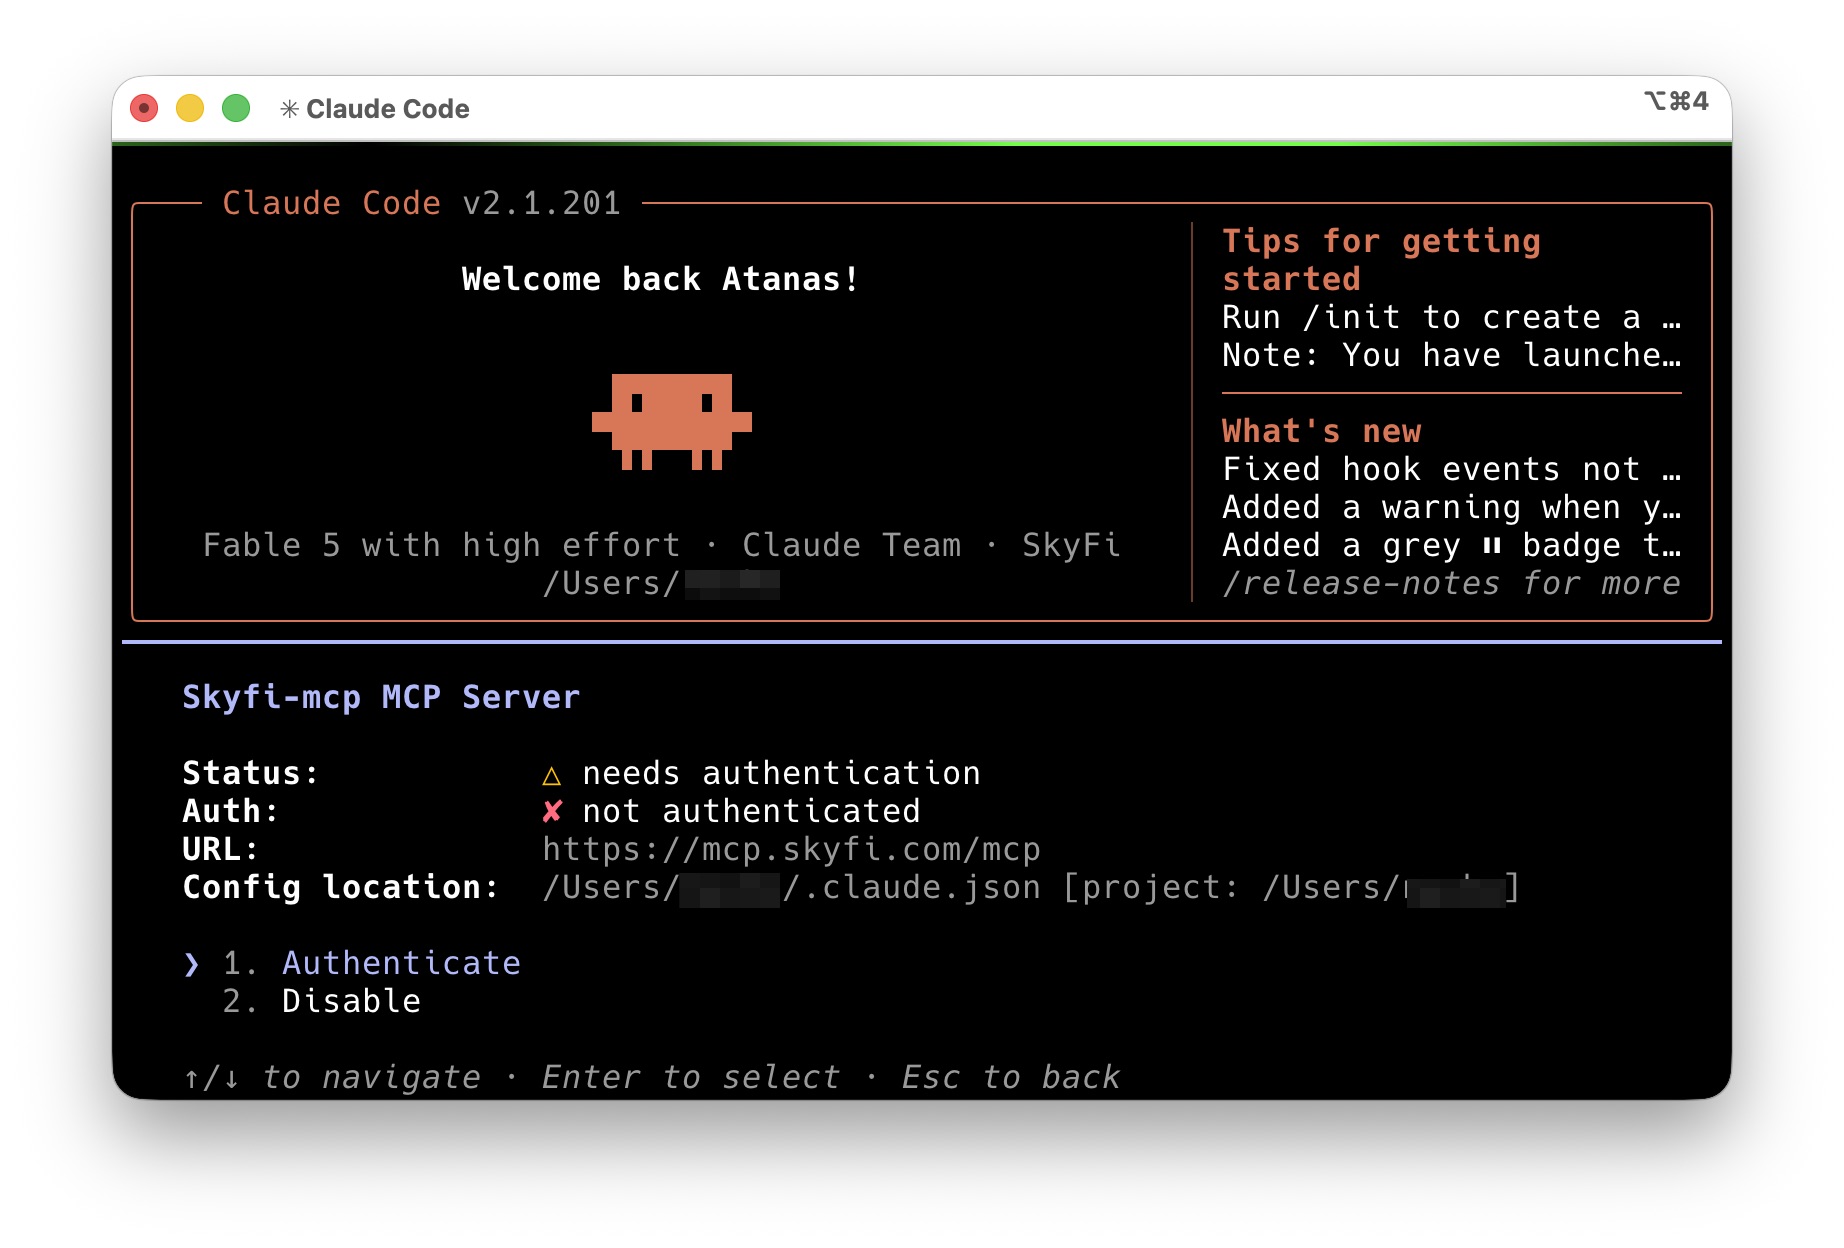
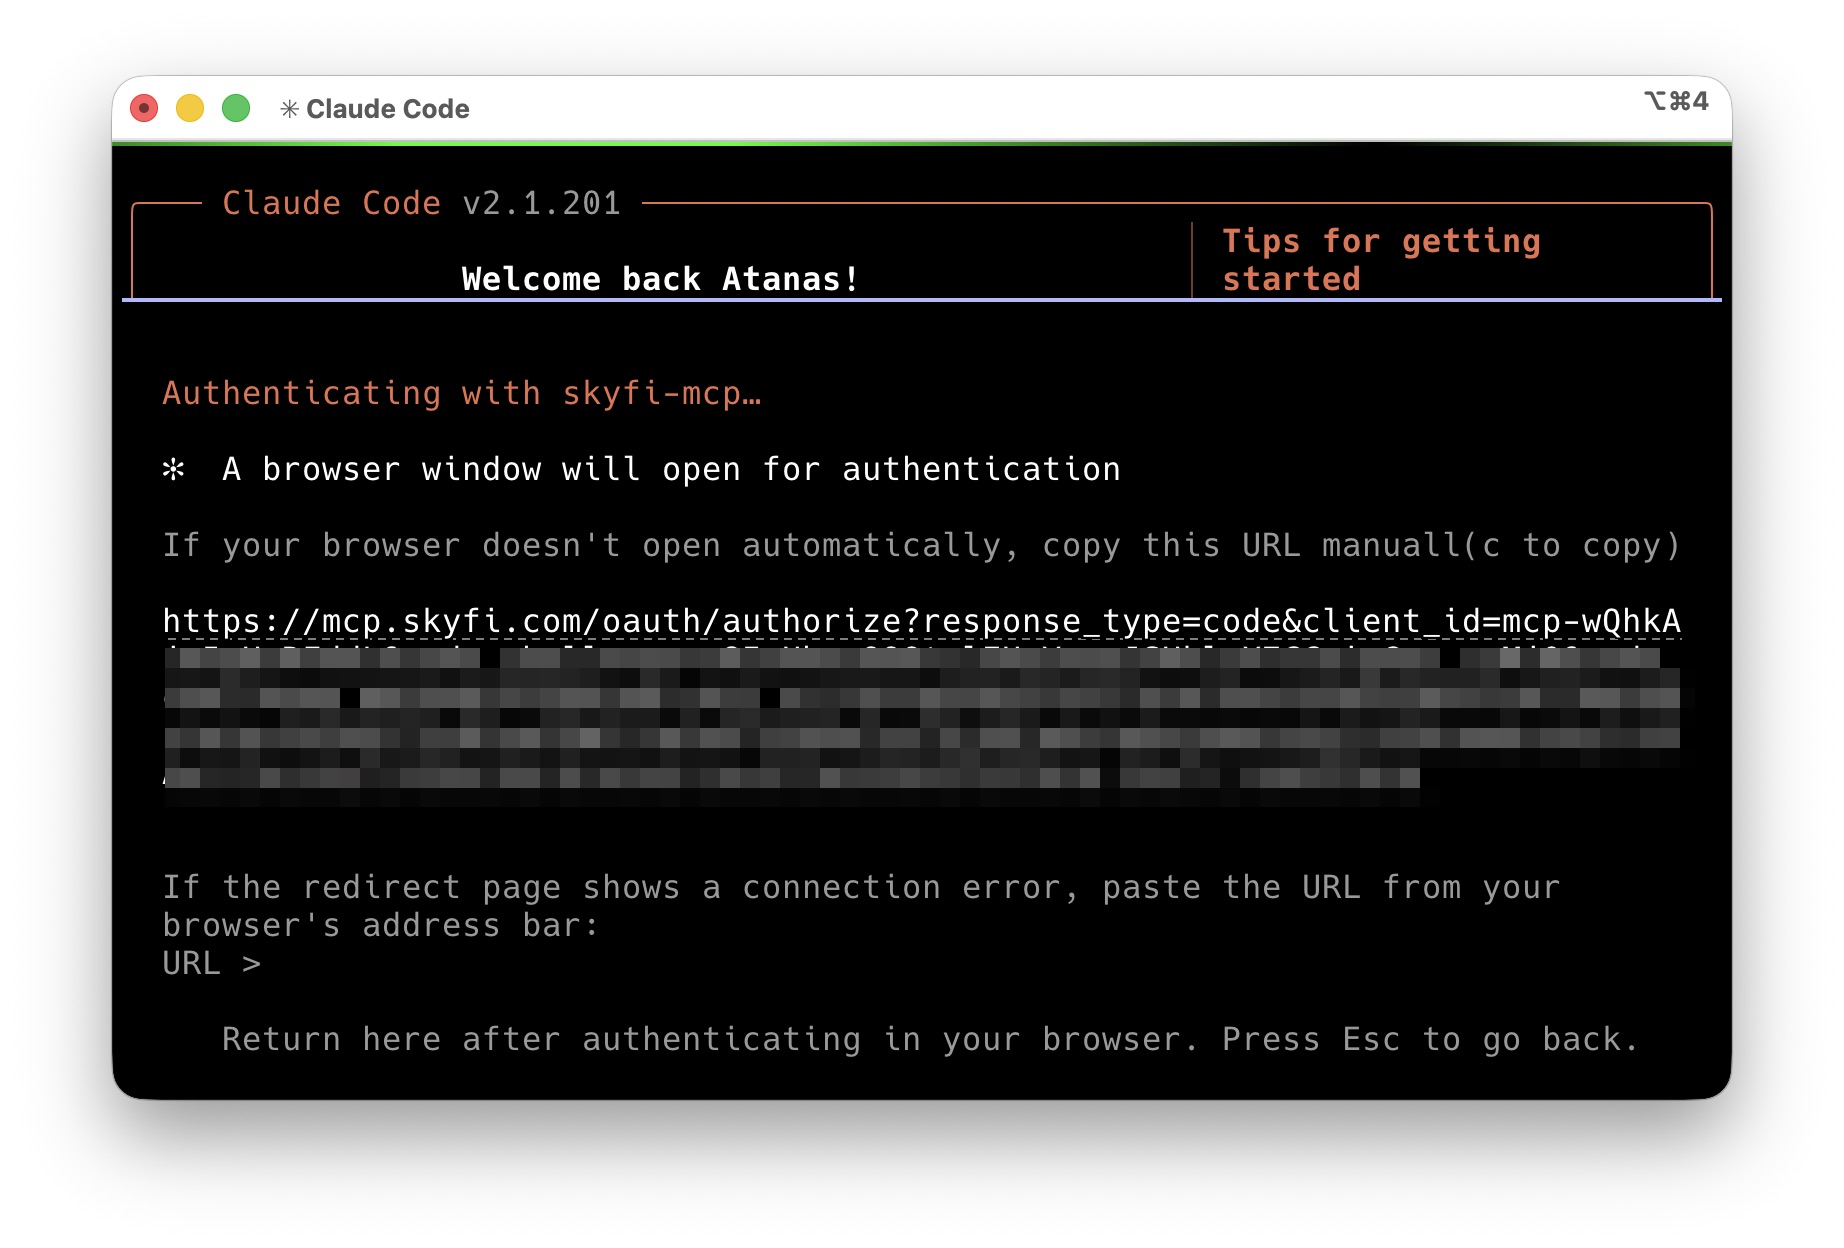
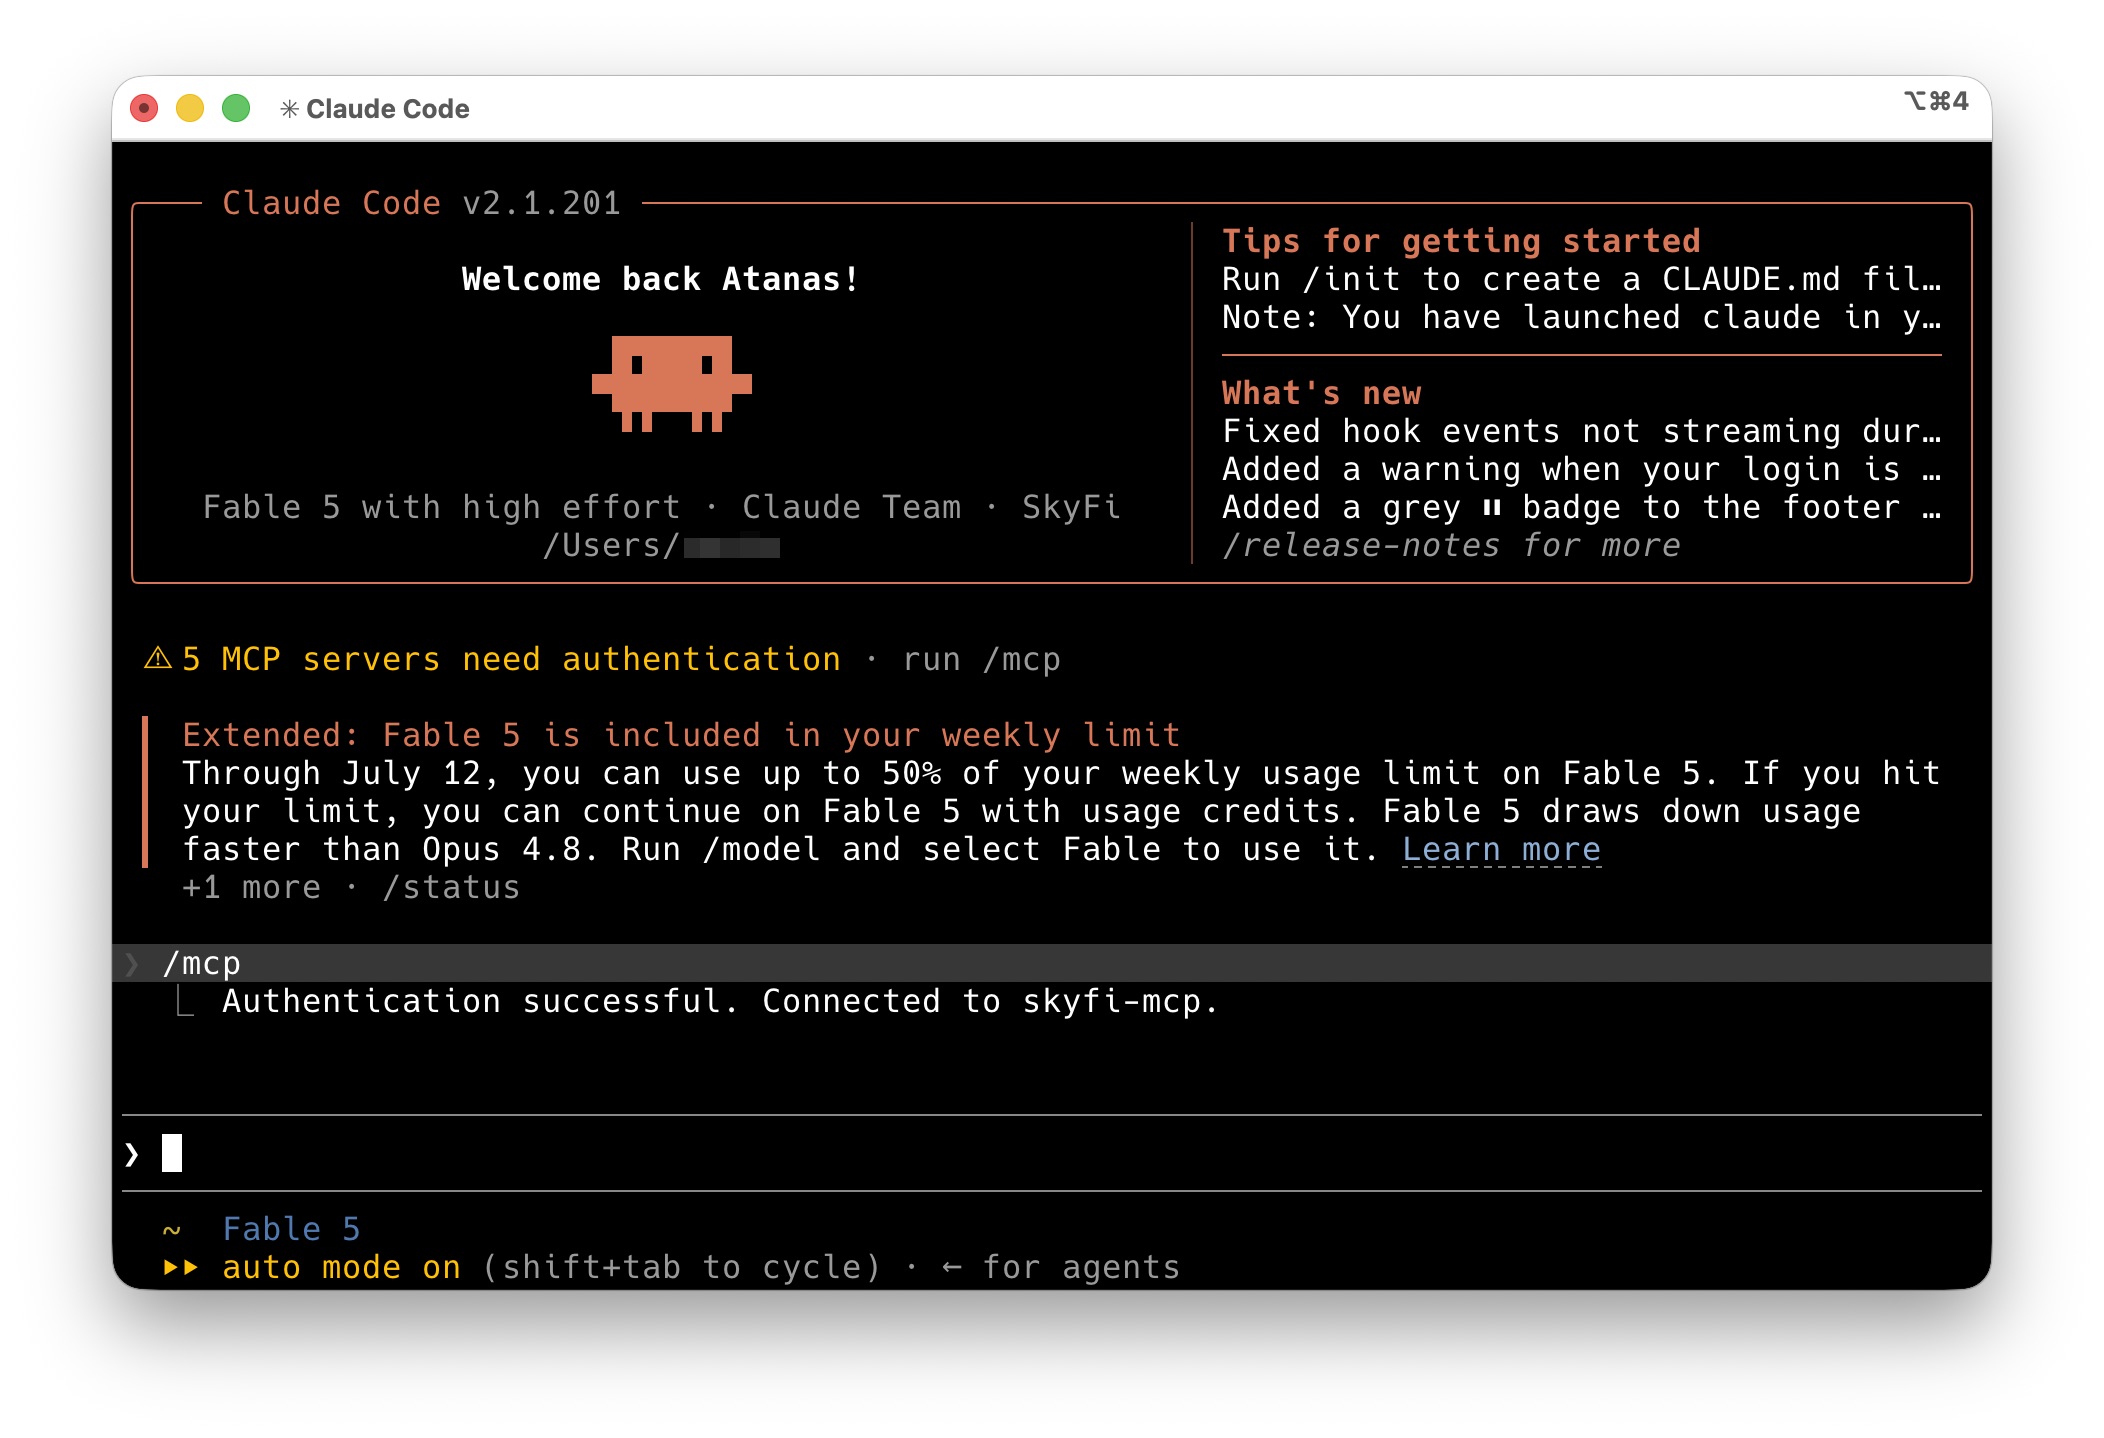
Authenticate. Start Claude Code with
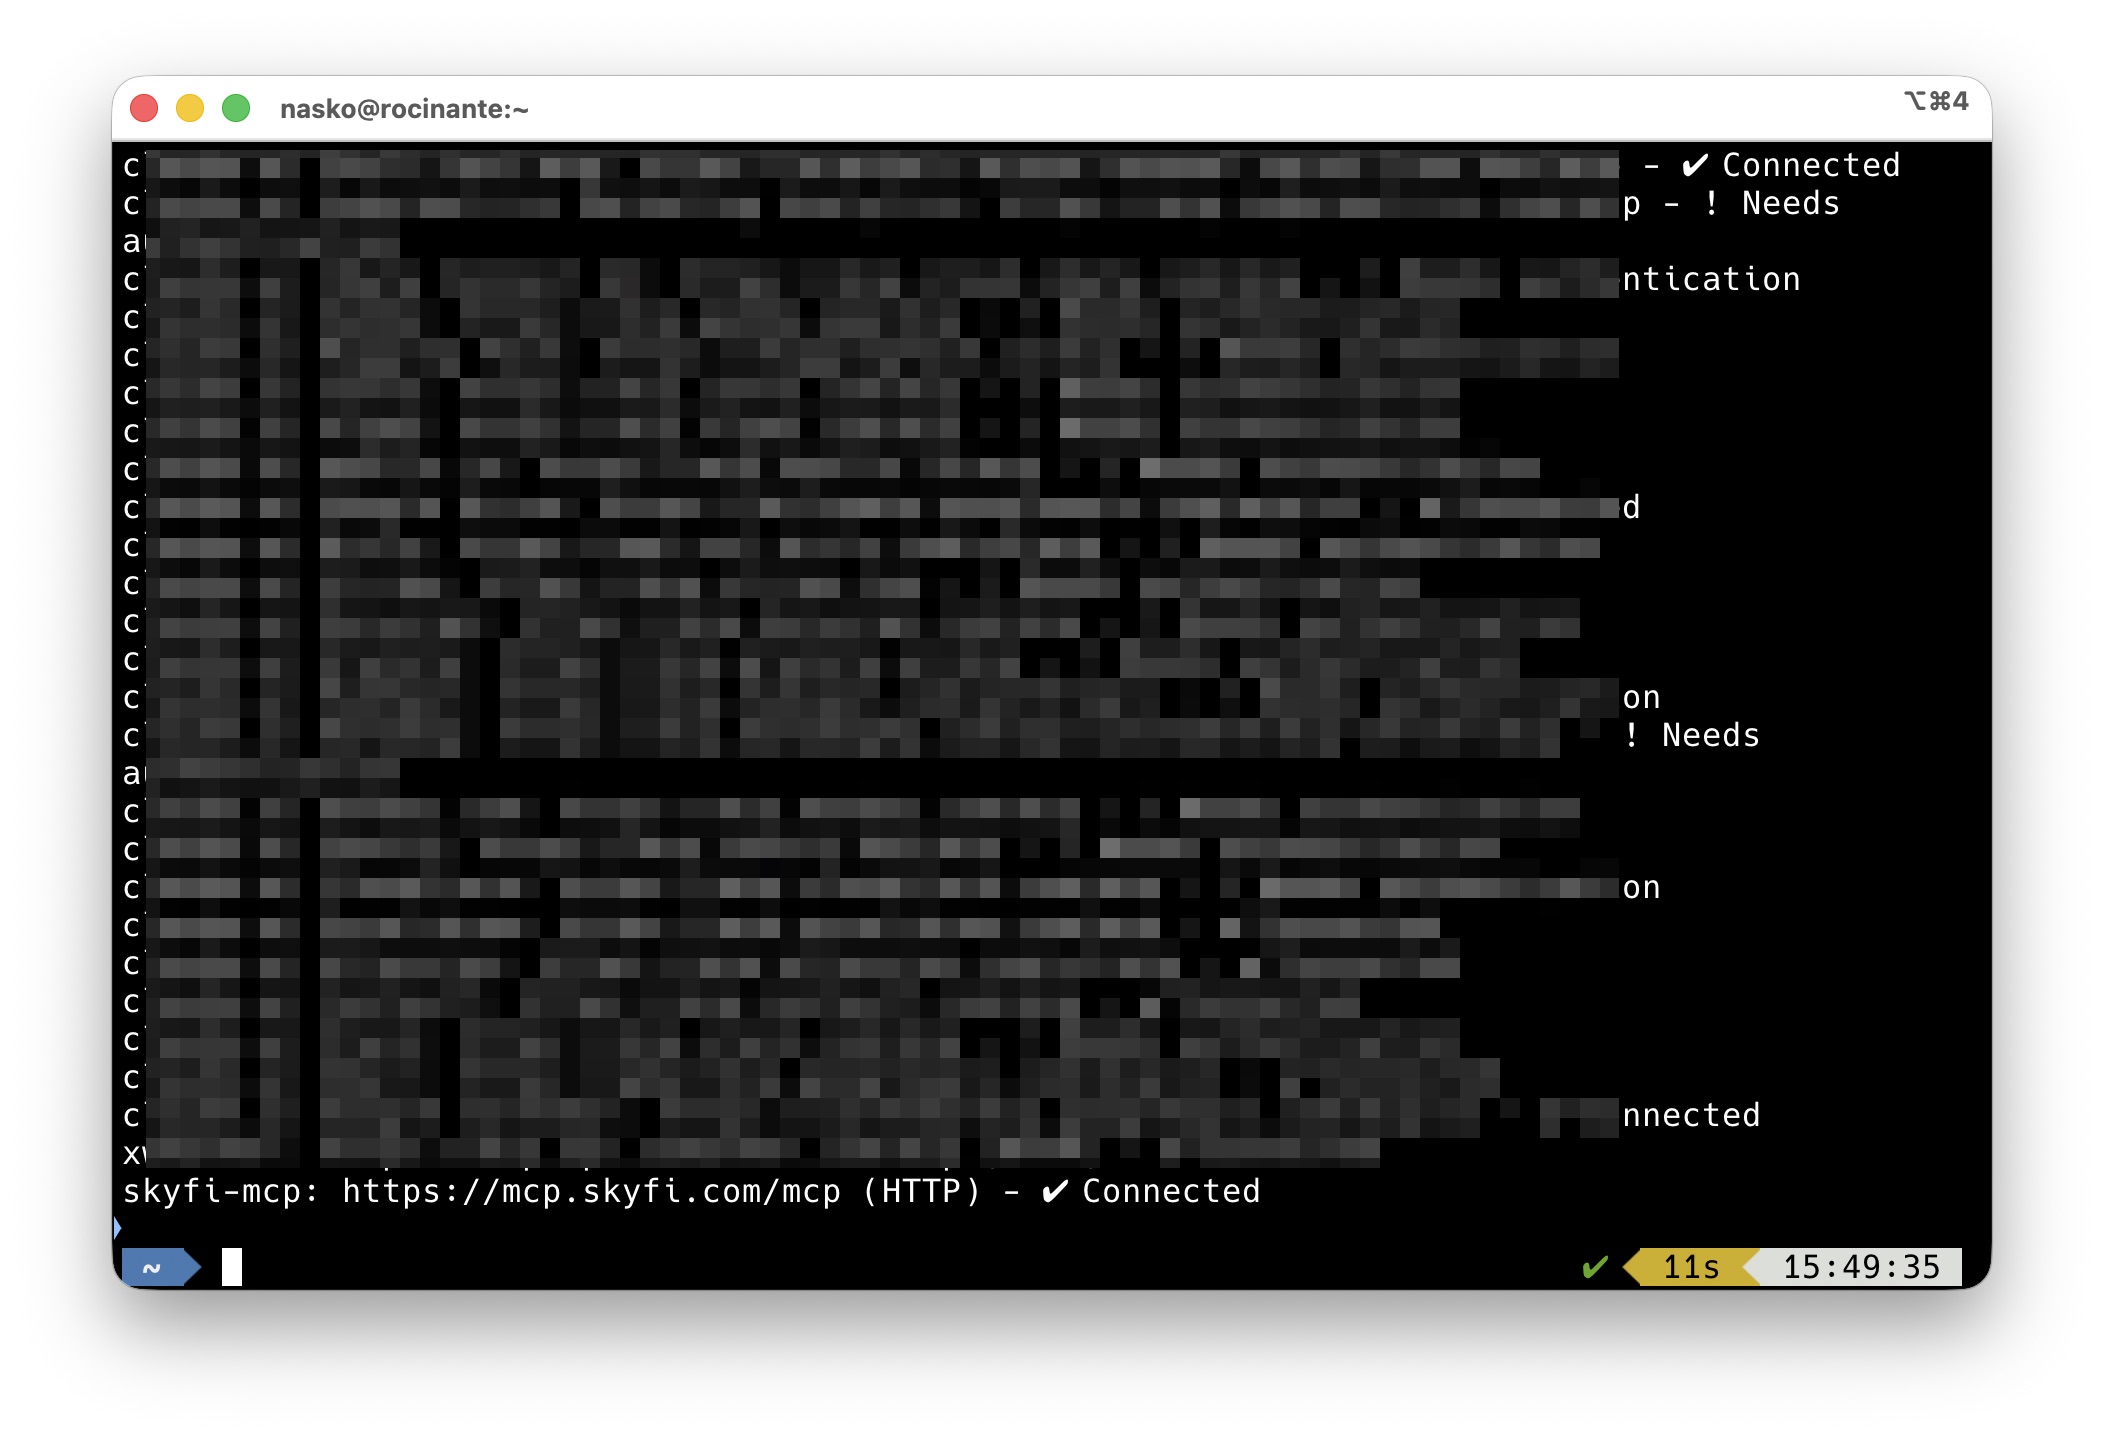
claude, then run the/mcpcommand. Select skyfi-mcp and choose Authenticate. Your browser opens SkyFi's sign-in page — log in, accept the Terms of Service, and approve access. Back in the terminal, the server shows as connected.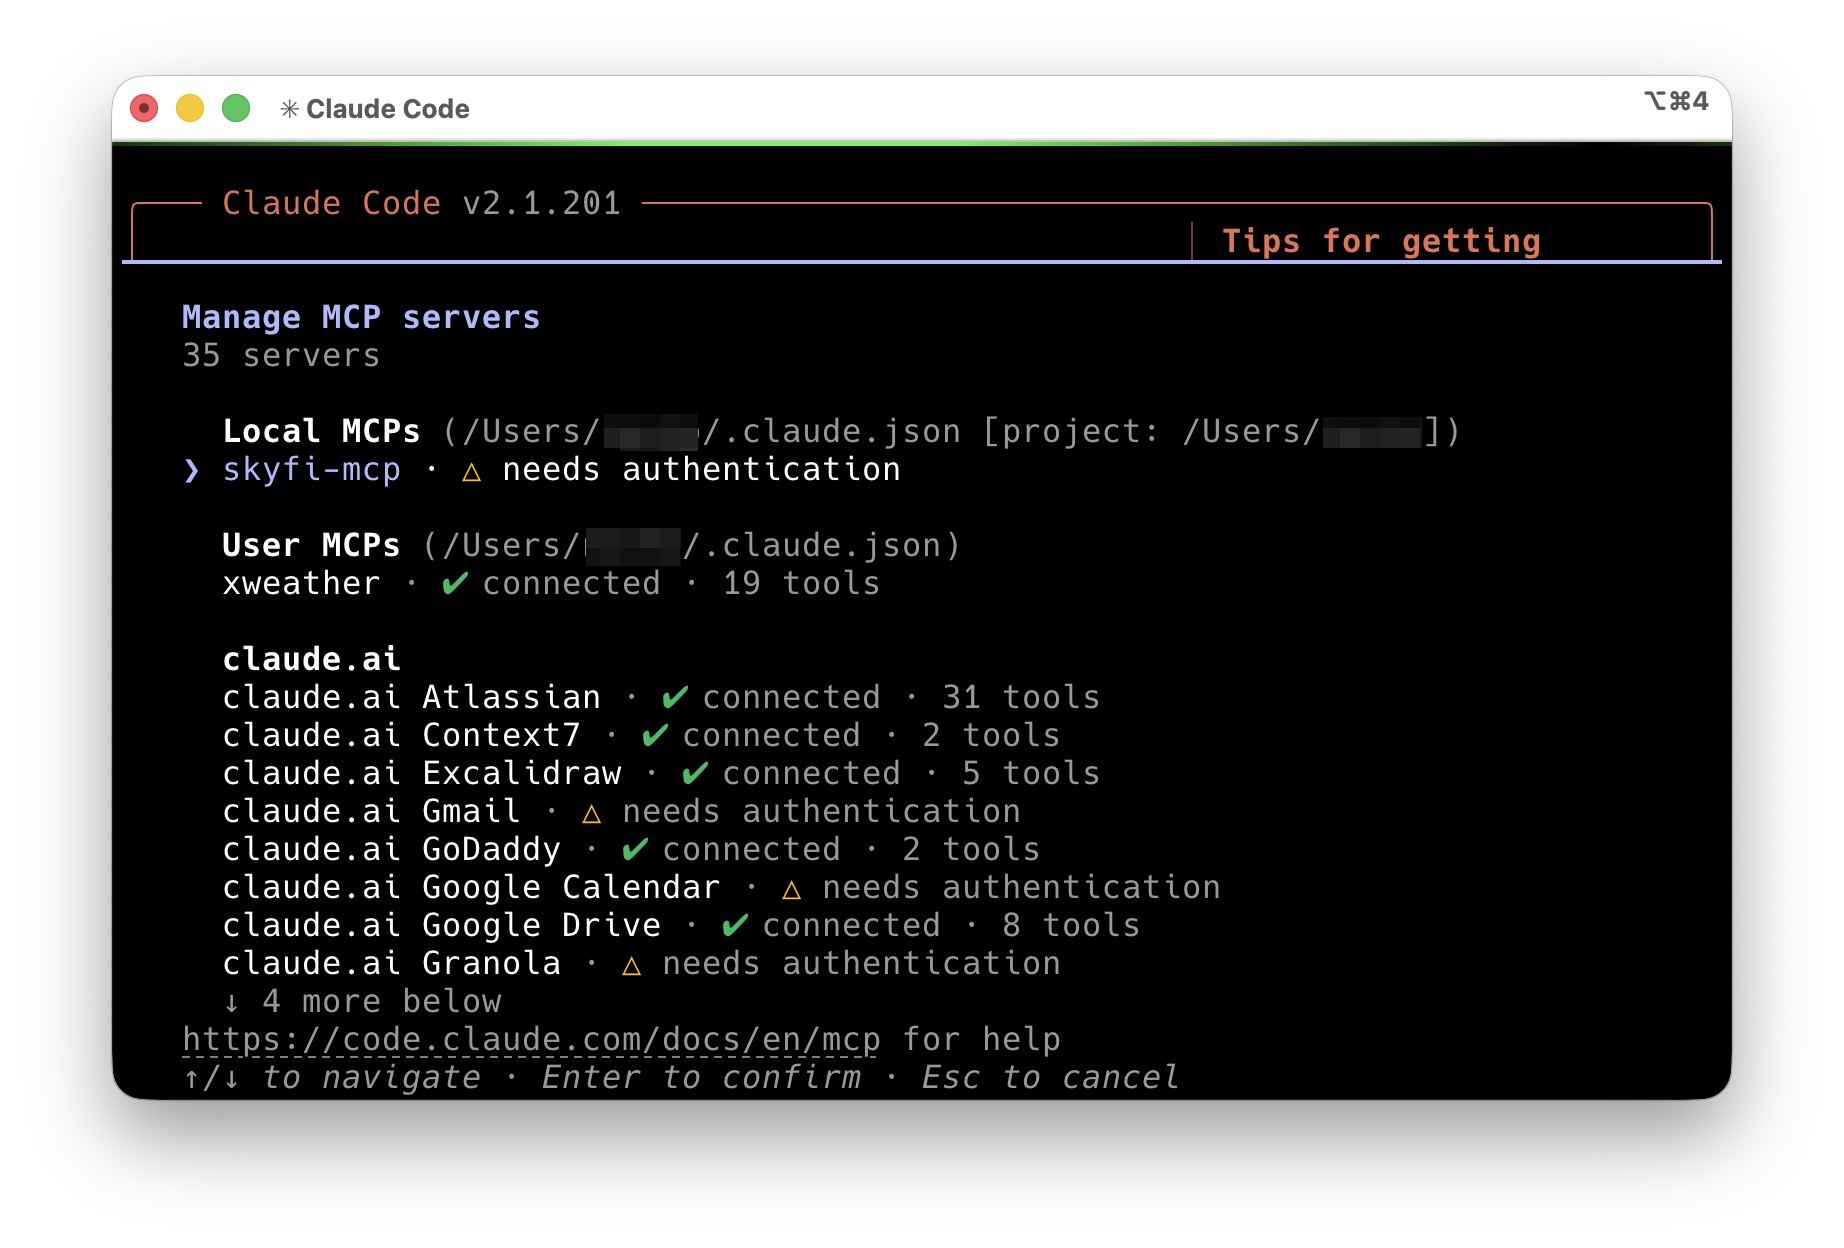
-
Verify and use. Check the connection any time with:
claude mcp listThen just ask, in plain language:
Check tasking feasibility for a 25 km² AOI over Austin, TX next week.
Set Up for a Claude Organization (Team & Enterprise)
On Team and Enterprise plans, an organization Owner adds the SkyFi connector once for the whole organization; members then connect it to their own SkyFi account. Individual members can't add custom connectors themselves.
As an organization Owner:
-
Open the organization's connector settings. On claude.ai, go to Organization settings → Connectors.
-
Add the connector. Click Add, hover over Custom, and select Web. Enter:
- Name:
SkyFi MCP - URL:
https://mcp.skyfi.com/mcp
Leave Advanced settings (OAuth Client ID and Secret) empty — the SkyFi MCP handles OAuth client registration automatically. Click Add.
- Name:
As a member of the organization:
-
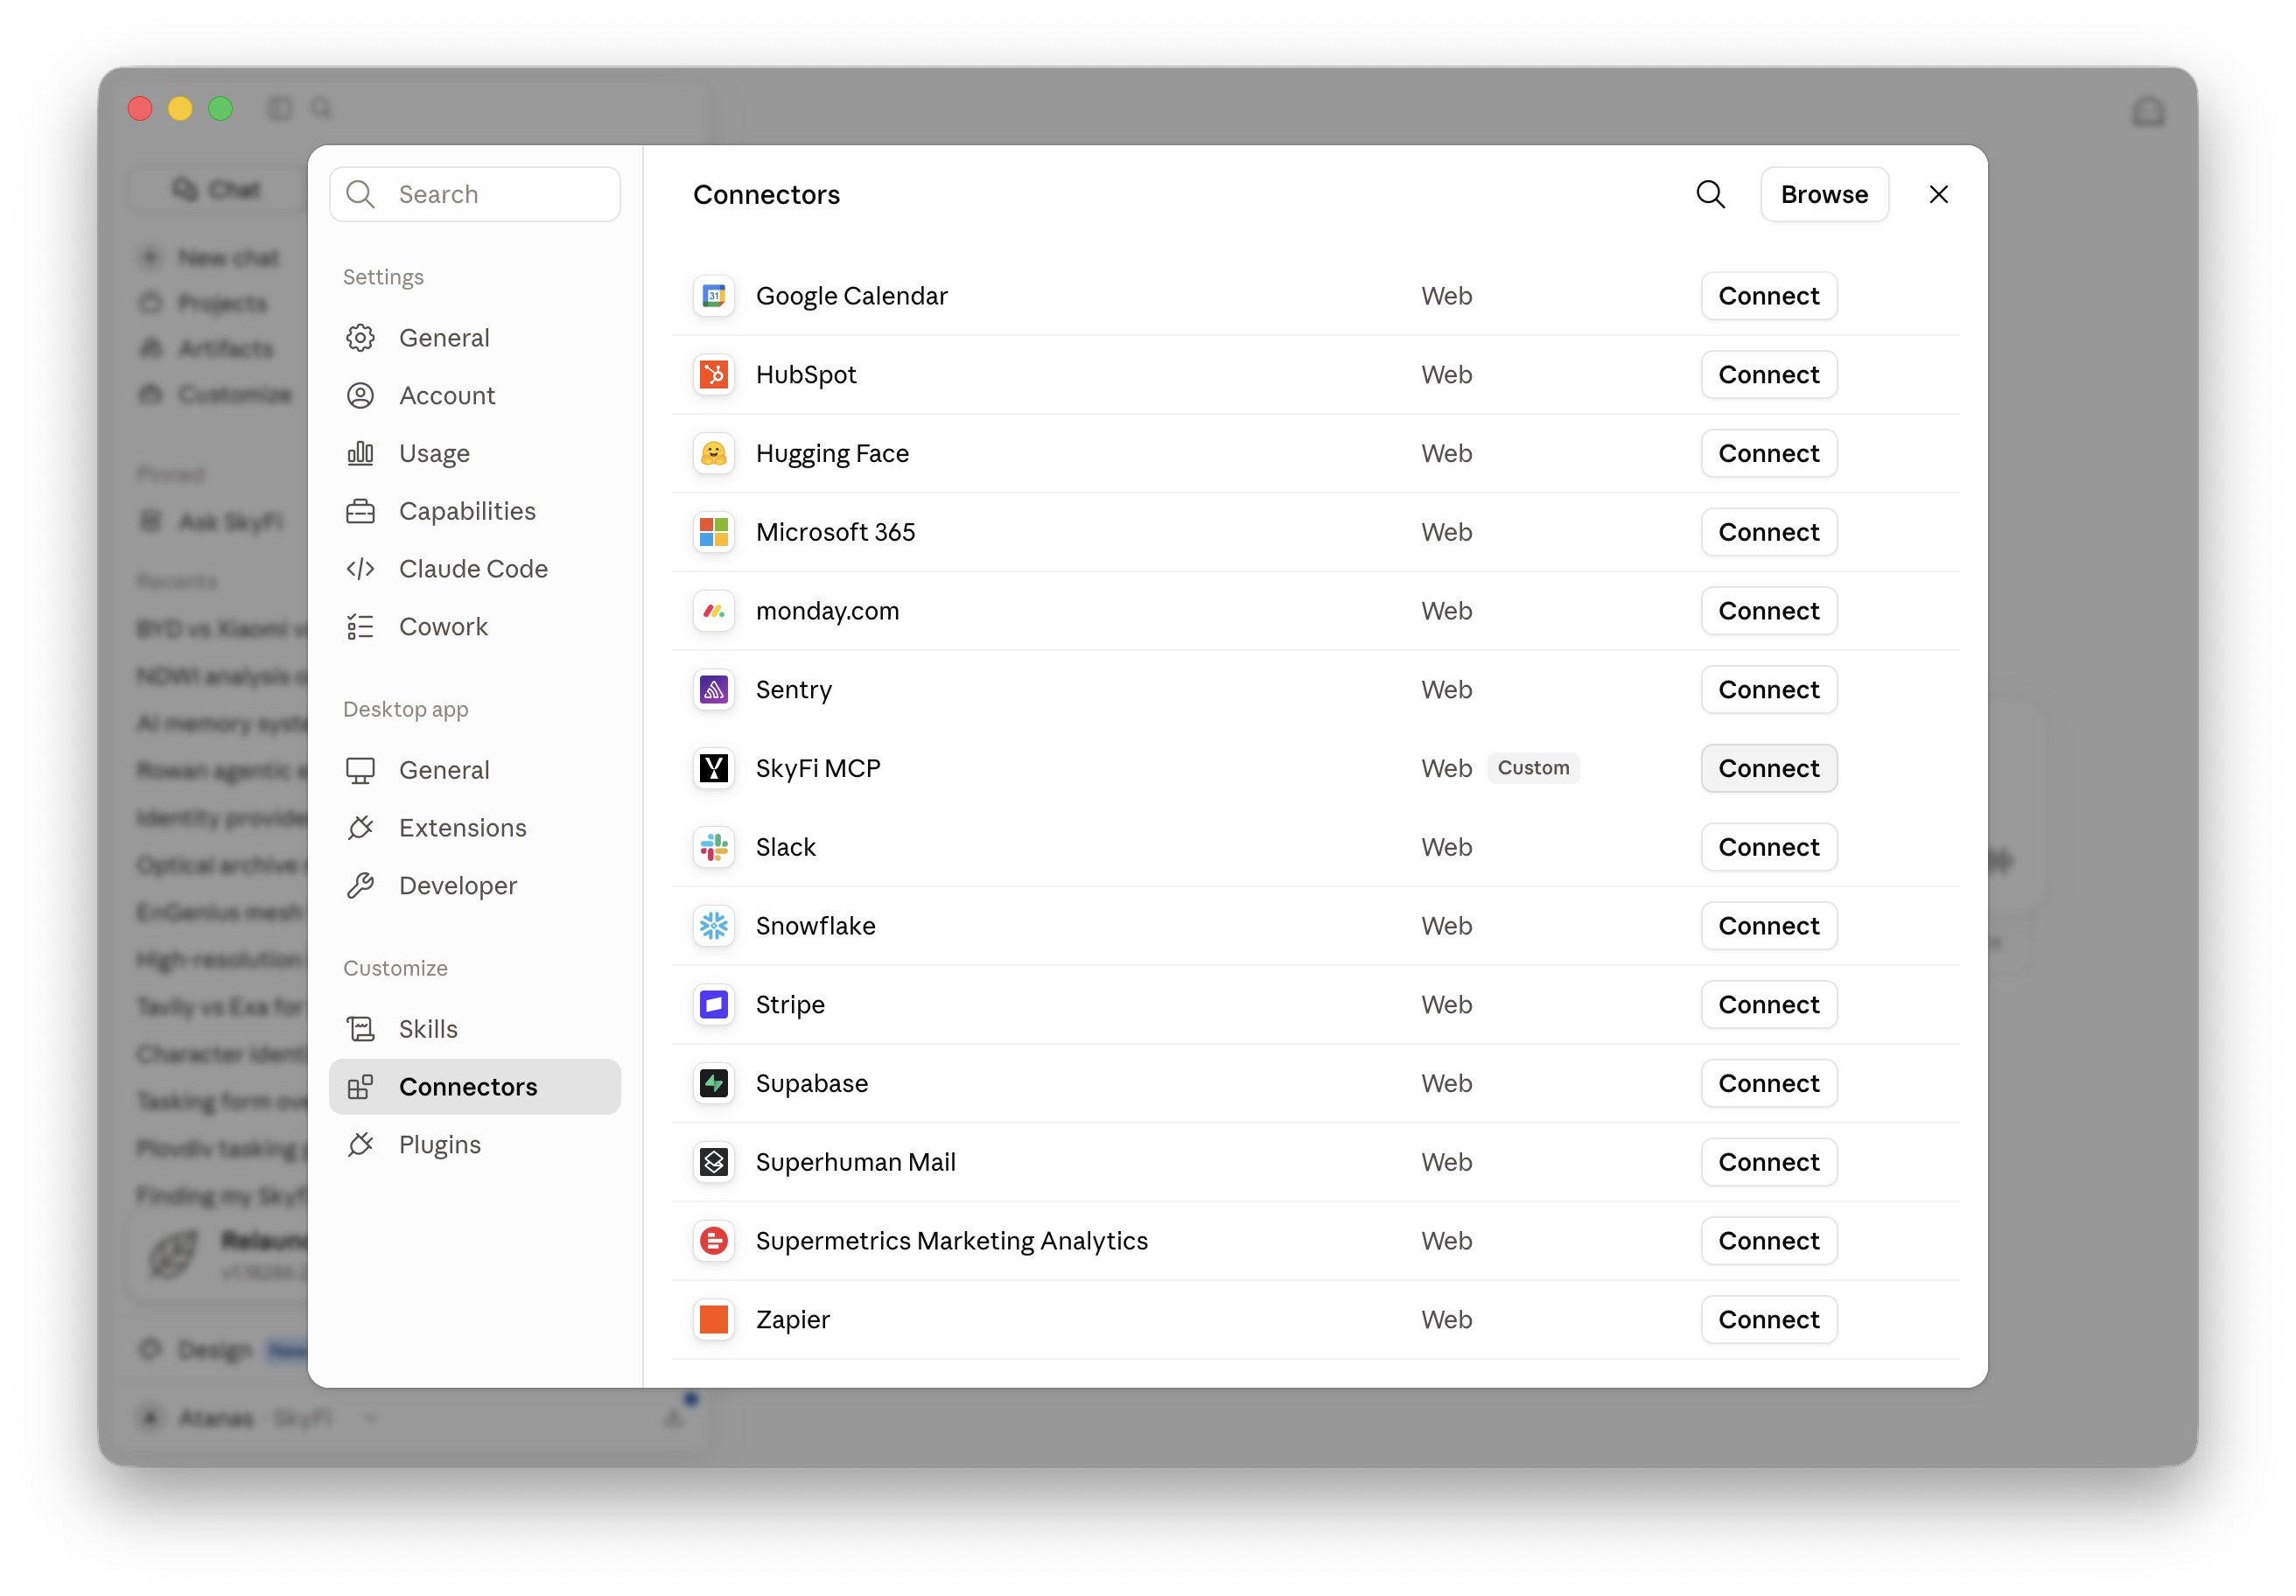
Connect your account. Go to Settings → Connectors, find SkyFi (marked with a Custom label), and click Connect. Sign in with your own SkyFi credentials and approve access — each member authenticates individually, so Claude only ever acts with that member's SkyFi permissions.
-
Enable it in a chat. In a conversation, open the tools menu under the message box and toggle SkyFi MCP on — same as the Claude Desktop flow, and it works on claude.ai, Claude Desktop, and the mobile apps.
Set Up in ChatGPT
- Turn on Developer Mode.
- Go to Settings → Apps → Create app.
- Add this MCP link:
https://mcp.skyfi.com/mcp - Set Authentication method to OAuth.
Note: the Authentication method must be set to OAuth — it's how ChatGPT signs you in with your SkyFi account. With any other setting the connector can't access your SkyFi data.
For details, review the ChatGPT API documentation.
Other MCP Clients
Codex
- Go to Settings → MCP servers.
- Select Streamable HTTP.
- Add this MCP link:
https://mcp.skyfi.com/mcp
For details, review the Codex documentation.
Codex CLI
-
Run this command in your terminal:
codex mcp add skyfi-mcp --url https://mcp.skyfi.com/mcp -
Enter
/mcpin Codex CLI. -
Select skyfi-mcp.
For details, review the Codex CLI documentation.
Cursor
- Give your agent this MCP link:
https://mcp.skyfi.com/mcp - Go to Settings → Cursor Settings.
- Select Tools & MCPs → Connect.
For details, review the Cursor documentation.
Grok
- Start a chat and select + (plus sign).
- Select Add connector → Custom.
- Add this MCP link:
https://mcp.skyfi.com/mcp
For details, review the Grok instructions.
Other platforms
You can connect to the SkyFi MCP on other AI platforms that support MCP
connections. Just use the SkyFi MCP link: https://mcp.skyfi.com/mcp.
Smoke Test: Am I Connected?
Whichever way you set it up, verify the connection with the skyfi_whoami
tool — it simply returns the SkyFi account Claude is acting as, so it's the
quickest end-to-end check that authentication works.
-
Start a new chat and ask:
Who am I on SkyFi?
-
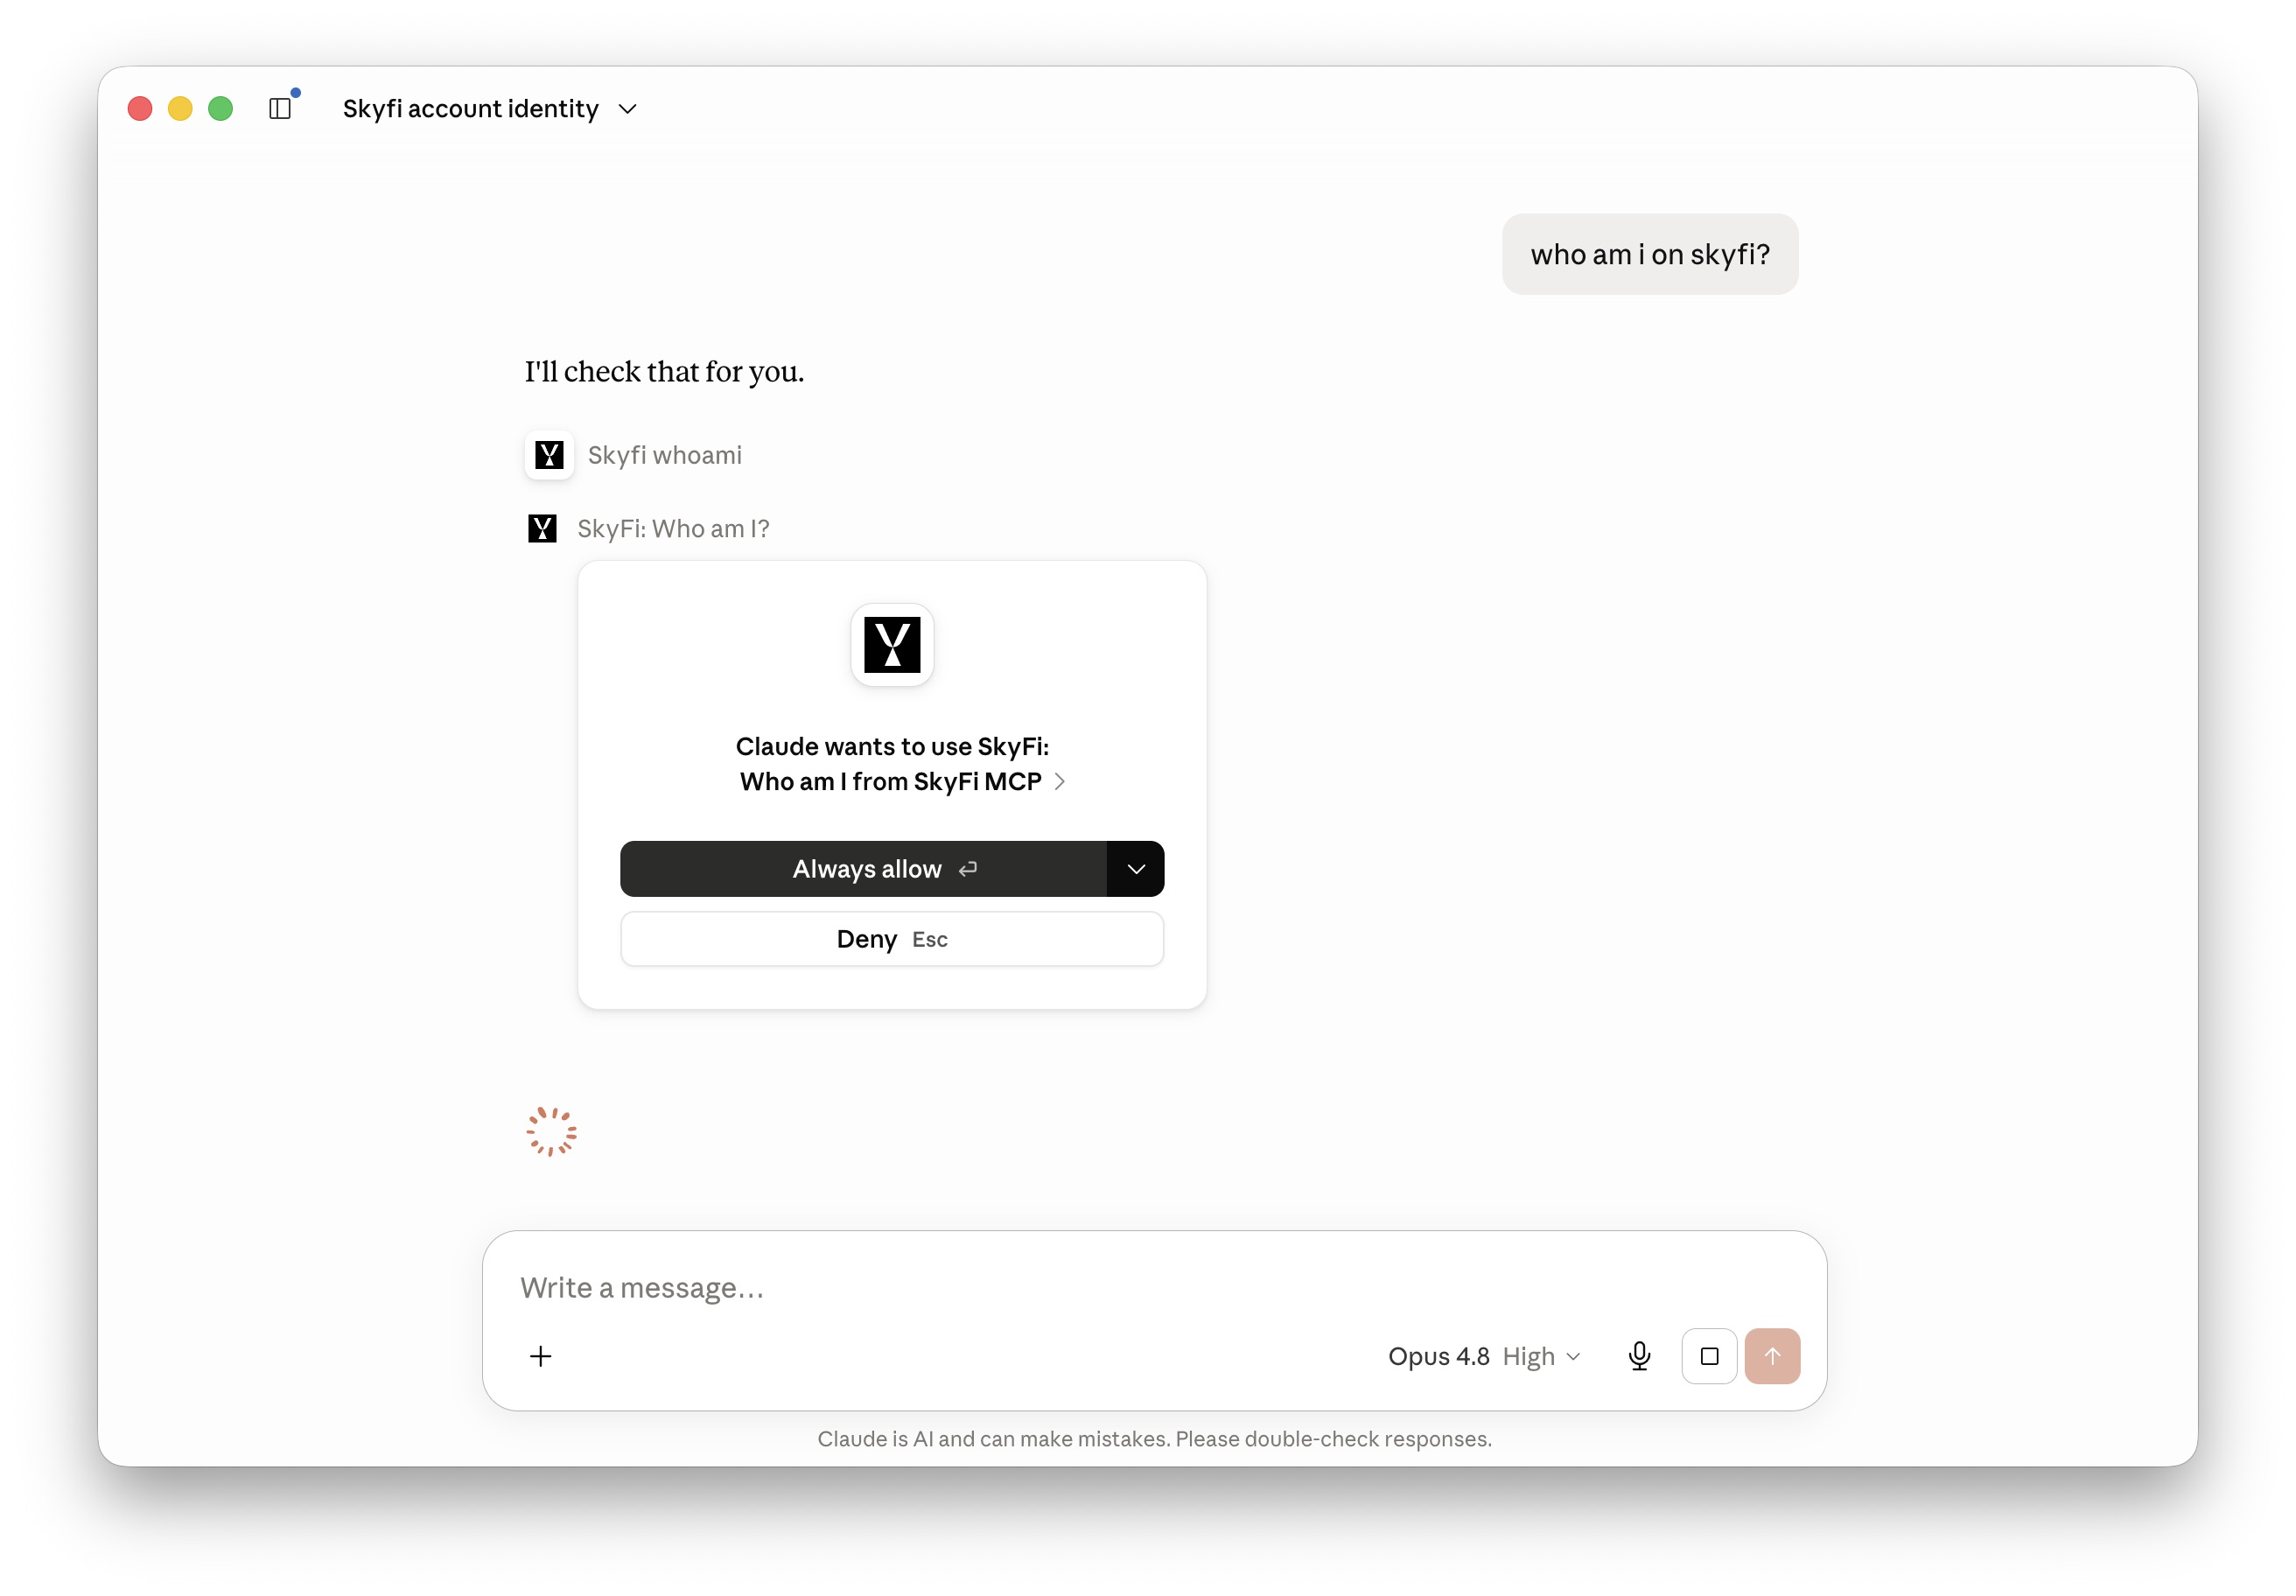
Allow the tool to run. The first time Claude calls a SkyFi tool it asks for your permission — choose Allow always (or Yes, and don't ask again in Claude Code) so read-only calls don't prompt every time.
-
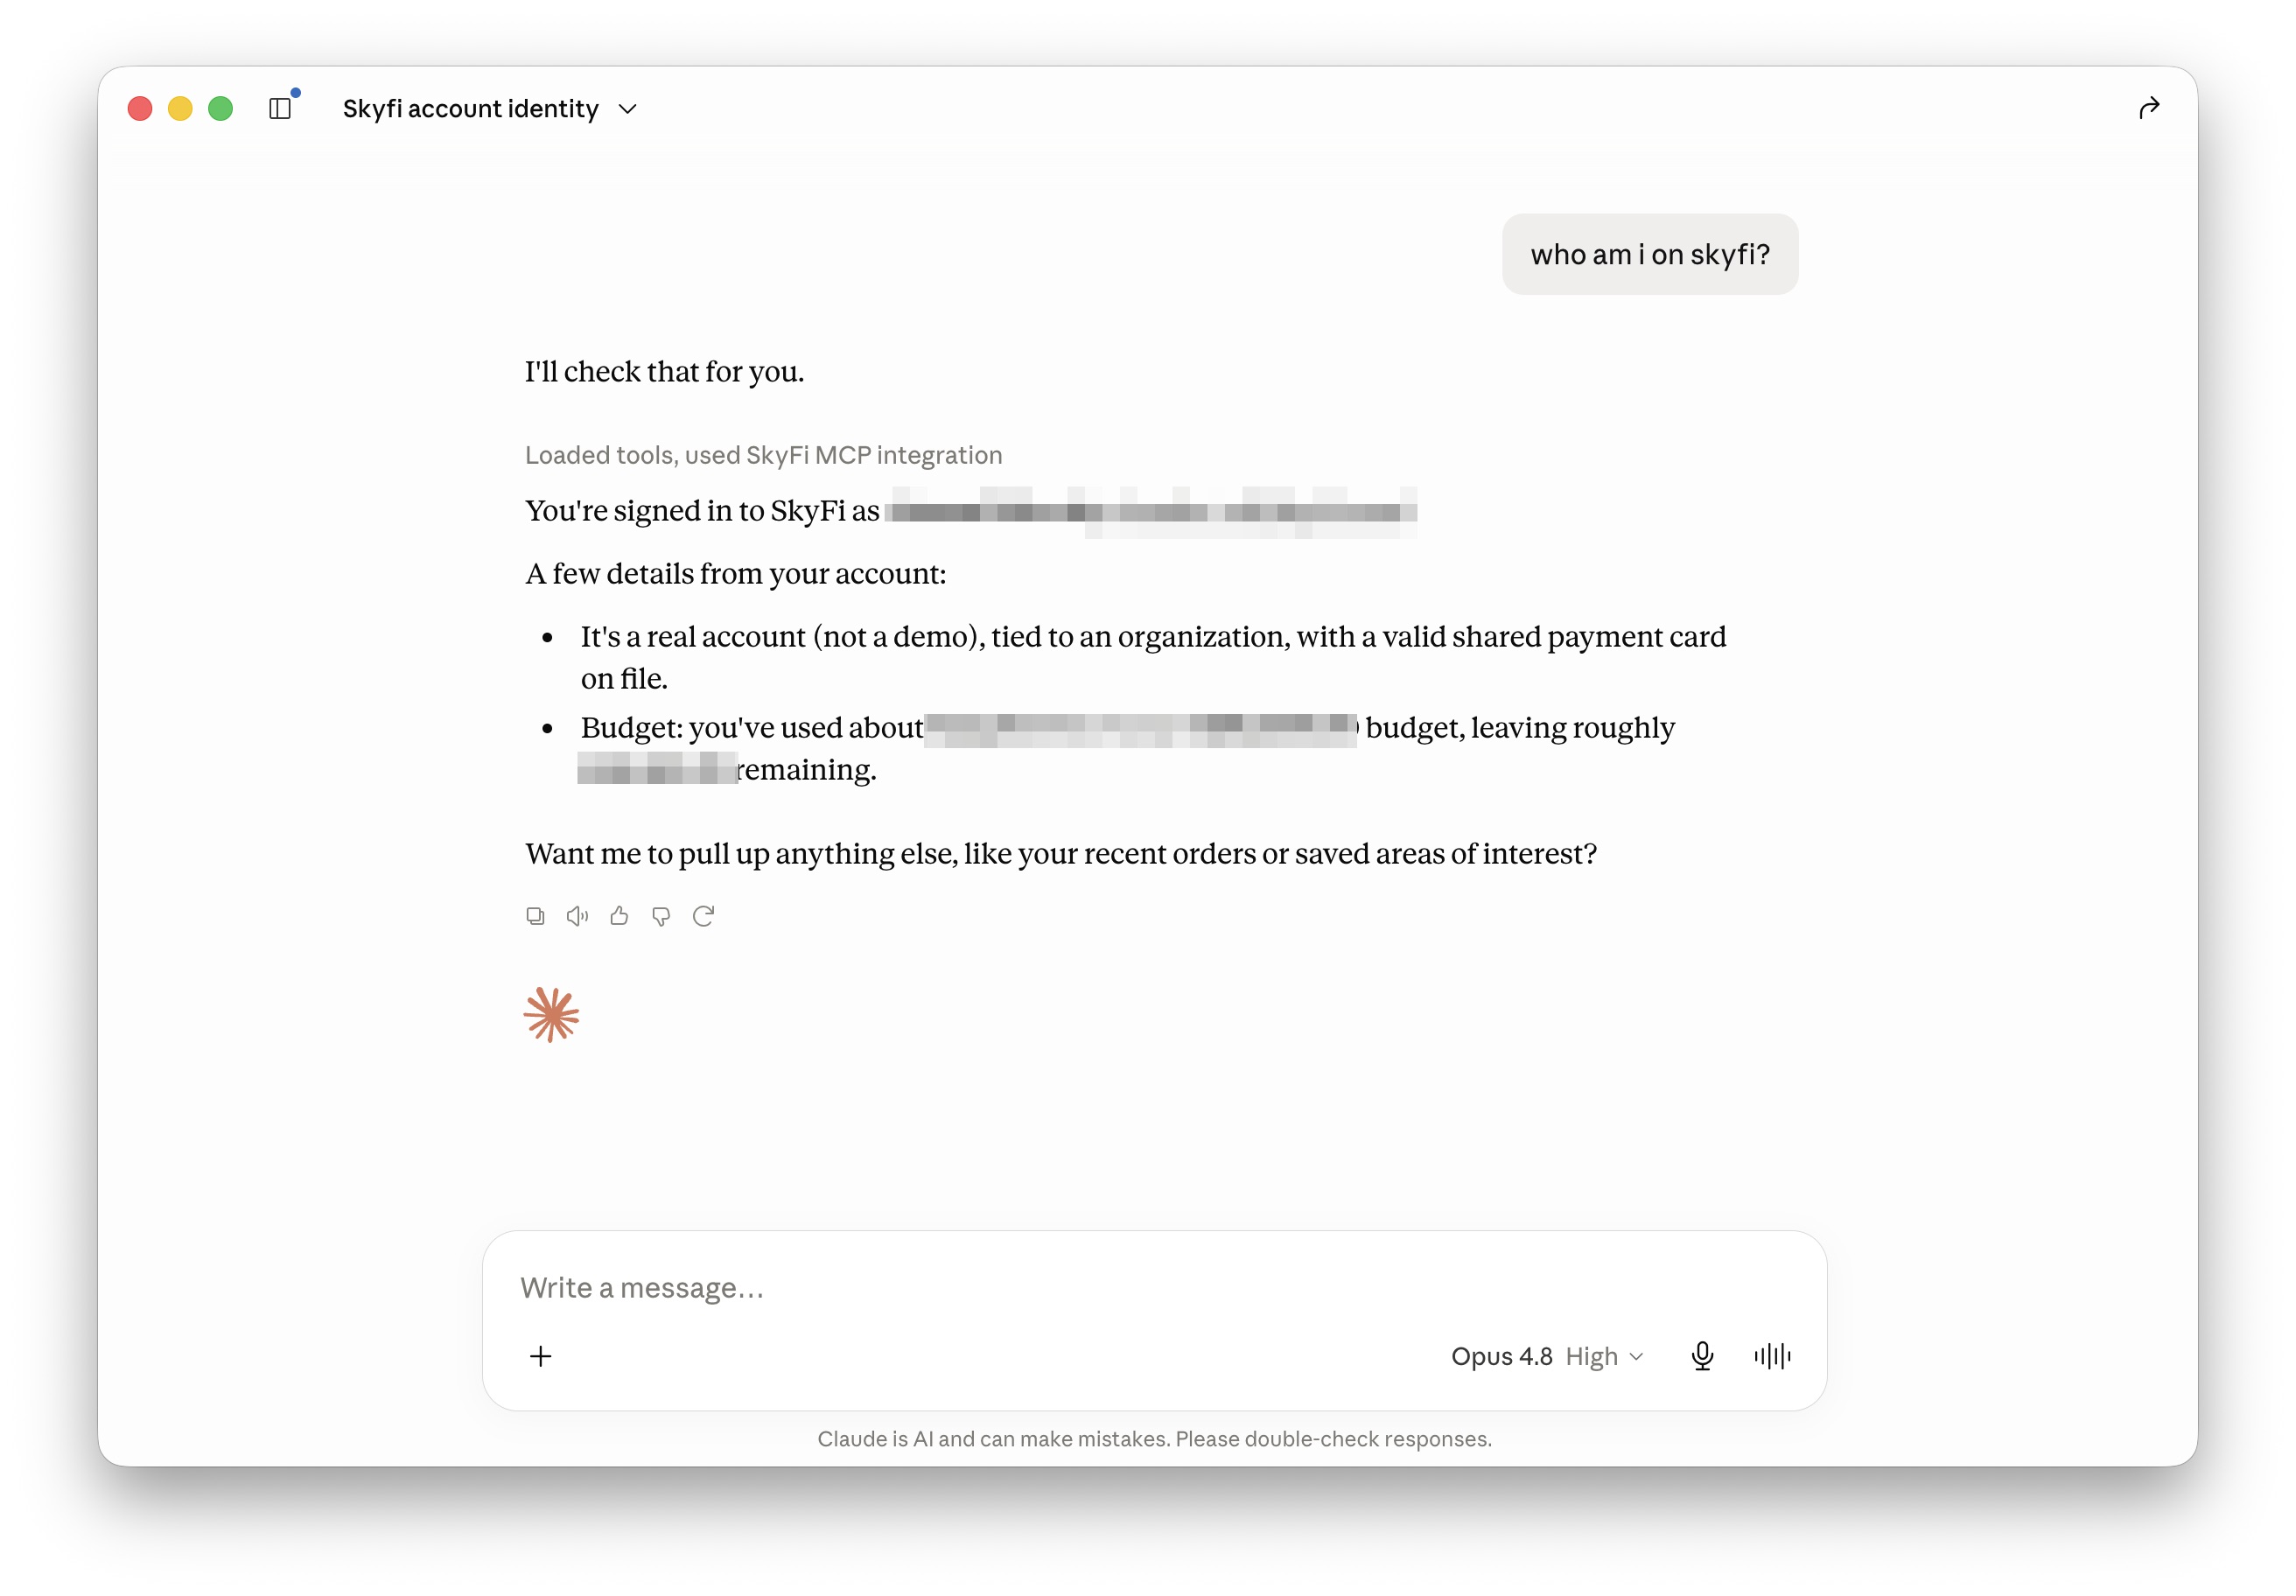
Check the output. You should see your SkyFi email, name, organization, and current budget. If it matches the account you signed in with, you're fully connected — Claude can now search imagery, check feasibility, and place orders on that account.
If the call errors or returns the wrong account, see Troubleshooting below.
Troubleshooting
- The connector won't connect / authentication fails. Sign out and retry; make sure you complete the browser sign-in with the SkyFi account you intend to use. Pop-up or ad blockers can interrupt the OAuth redirect.
- Claude doesn't call SkyFi tools. In Claude Desktop, confirm the
connector is toggled on in the chat's tools menu. In Claude Code, run
/mcpand confirm the server status is connected. - Orders are blocked. Placing paid orders requires sufficient balance on your SkyFi account and may require explicit confirmation flags — the tool output will tell you exactly what's missing.
- Still stuck? Reach us at [email protected].
Video Walkthroughs
Prefer watching over reading? Full end-to-end walkthroughs: